Bing Ads (now known as Microsoft Advertising) is an effective pay-per-click (PPC) platform for Shopify store owners to reach a broader audience. However, the availability of Microsoft Advertising features may vary by market.
Setting up conversion tracking for Bing Ads is essential to measure the success of your campaigns, optimize ad performance, and gain valuable insights into your customers’ behaviors.
This guide will take you step-by-step through setting up Bing Ads conversion tracking on Shopify, so you can ensure every click counts.
Note: The availability of Microsoft Advertising features may vary by market. For details read Google’s official document.
Prerequisites
Before you start, ensure you have the following in place:
1) A Shopify Store: You must have an active Shopify store of any type with products and a fully configured checkout process.
2) A Bing Ads (Microsoft Advertising) Account: If you don’t already have one, follow these steps to create an account:
- Visit the Microsoft Advertising website.
- Click on Sign up now and follow the prompts to set up your account.
- Provide your business details, payment method, and accept the terms of service.
3) Access to Shopify’s Theme Code: You will need to edit your Shopify theme files to add the tracking code. If you’re not comfortable with code editing, consider enlisting help from a professional..
4) UET Tag Helper (Optional but Recommended): The UET Tag Helper is a browser extension available for Chrome and Microsoft Edge. It helps ensure that your Universal Event Tracking (UET) tag is installed correctly and allows you to troubleshoot any issues during the implementation process.
Simplify and Improve Bing Ads Tracking with Analyzify
Setting up Bing Ads tracking manually can work, but it often misses key touchpoints and limits your ability to fully optimize campaigns.
Analyzify offers a robust alternative: a complete Microsoft Bing Ads tracking solution built for Shopify stores.
It simplifies implementation while giving you access to full-funnel event tracking, advanced parameter capture, and GDPR-compliant data handling.
Whether you prefer a Direct integration or a GTM-based setup, Analyzify connects your store to Bing Ads with end-to-end conversion tracking. The result: accurate data, better targeting, and less manual work.
⚡Bonus Content: Analyzify Microsoft Bing Integration Guide
Benefits of Using Analyzify for Bing Ads Tracking
Analyzify does more than just install a UET tag, it ensures your Bing Ads tracking is complete, optimized, and reliable. Here are the key benefits of using Analyzify for Bing Ads tracking:
✅ Track Full-Funnel E-commerce Events: Analyzify tracks all important customer actions, including:
- Add to Cart
- Begin Checkout
- Add Payment Info
- Add Contact Info
- Add Address Info
- Add Shipping Info
- Purchase
✅ Capture Valuable Parameters for Better Targeting: Each event is enriched with critical details to support dynamic remarketing and campaign optimization, such as:
- ecomm_prodid (Product ID)
- ecomm_prodname (Product Name)
- ecomm_category (Category)
- ecomm_totalvalue (Order Value)
- ecomm_pagetype (Page Type)
✅ Cart-Level & User Data for Segmentation: Includes advanced data points like:
- Cart ID for cart-level analysis
- User type (new vs. returning visitors)
✅ Choose Your Integration Method: You will have the option to choose your integration method. We suggest using a simple Direct Integration for fast setup, or going with GTM if you need more flexibility or already use Google Tag Manager.
✅ GDPR & Microsoft Consent Mode Ready: Analyzify includes support for Microsoft Consent Mode and handles consent-based tracking automatically—so you stay compliant without extra work.
✅ Built-In Validation & Migration Support: Avoid double-counting and data loss with automatic safeguards and expert validation during onboarding.
Analyzify helps you move beyond basic goal tracking and gives you the tools needed to optimize ad performance, retarget smarter, and gain reliable insights, without touching code.
 Professional Implementation & Migration Included
 Set Up Bing Ads Conversion Tracking with Analyzify
Analyzify provides turnkey integration solutions that save time and ensures accurate tracking across marketing platforms.Step-by-Step Guide to Setting Up Bing Ads Conversion Tracking
Create a UET Tag in Bing Ads
The first step to setting up conversion tracking is adding the installation script to your Shopify store. This initiates the event flow. To get this script, you’ll need to create a Universal Event Tracking (UET) tag in your Microsoft Advertising account. Here’s how.
Keep this code handy, as you will need it for the next step.
The second step will be creating a goal using this event flow. When setting up a goal, you’ll have the option to determine whether it should be evaluated for all conversions.
If this option is activated, the goal is used for campaign performance (similar to ‘primary’ in Google Ads); if not, it can be used for statistical evaluation only (similar to ‘secondary’ in Google Ads).”
Add the UET Tag to Your Shopify Store
Now that you have your UET tag, you need to install it on your Shopify store. There are two ways to do this:
You can insert the code in two places: your theme’s head section (theme.liquid) and the checkout thank-you page.
Alternatively, and more preferably, you can add the entire code as a pixel. In this case, you won’t need to add anything to theme.liquid.
Important: It’s worth noting that for purchase tracking, you can use the Order Status Page (OSP) until 2025. However, adding the code as a pixel is generally the better approach for more comprehensive tracking.
A. Add the UET tag to your Shopify theme:
B. Add the UET tag to your checkout page:
Verify UET Tag Implementation
After you’ve installed the UET tag, it’s important to verify that everything is working correctly. There are two main ways to do this.
A. Verify using the UET Tag Helper extension:
Install the UET Tag Helper extension for Chrome or Microsoft Edge.
Open your Shopify store and browse a few pages.
Click the UET Tag Helper icon in your browser toolbar.
Activate the debugging mode
The extension will display how many UET tags were detected on the page, along with their status.
- A green checkmark means the tag is active.
- If there are issues, the extension will show details and troubleshooting suggestions.
B. Verify through Microsoft Advertising:
Log into your Bing Ads (Microsoft Advertising) account.
Go to Conversions > UET tag in the menu.\n\n
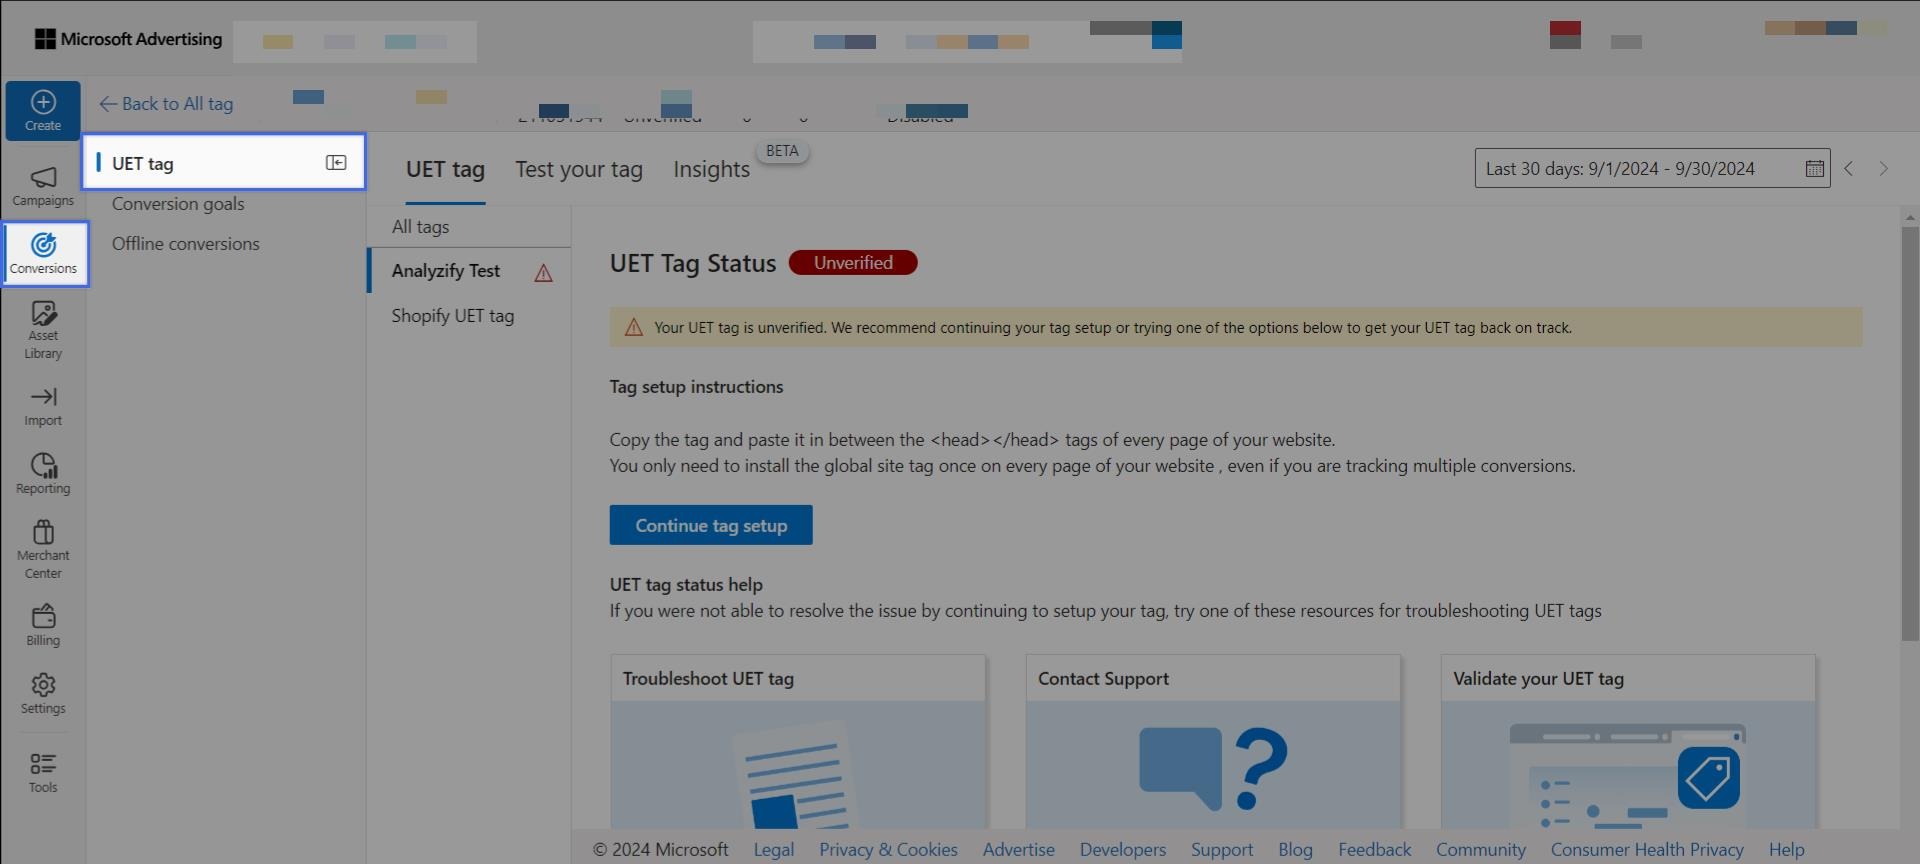
- Find your UET tag in the list and check the Tracking status column.
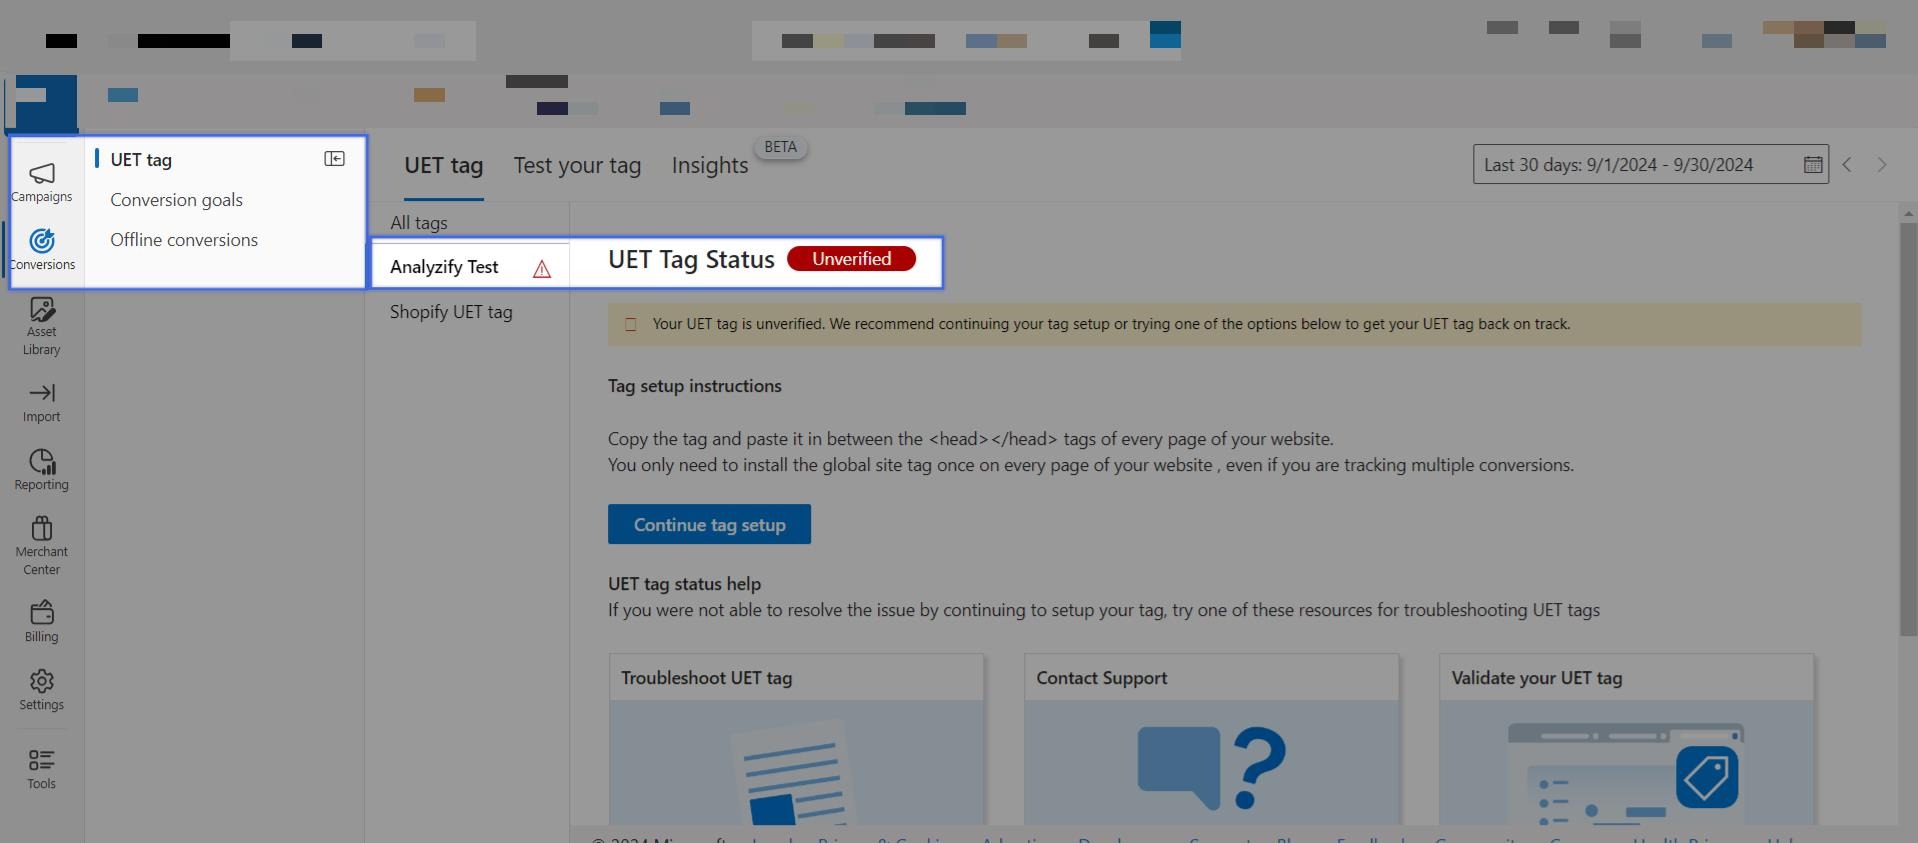
- Unverified: Microsoft Advertising hasn’t received any data yet (this can take up to 24 hours).
- Tag active: Your tag is working correctly and receiving data.
- Tag inactive: No data has been received in the last 24 hours. If this happens, double-check the placement of your tag.
Note: It’s important to note that for full conversion verification, you need to have an active campaign. However, during this process, your UET ID will still collect event data. You can click on the UET ID to check the current data flow, even without an active campaign.
Set Up Conversion Goals
Now that your UET tag is verified, the next step is to set up conversion goals. Conversion goals define the specific actions you want to track (e.g., purchases, sign-ups, visits to a specific page).
- In Microsoft Advertising, go to Conversions > Conversion goals.
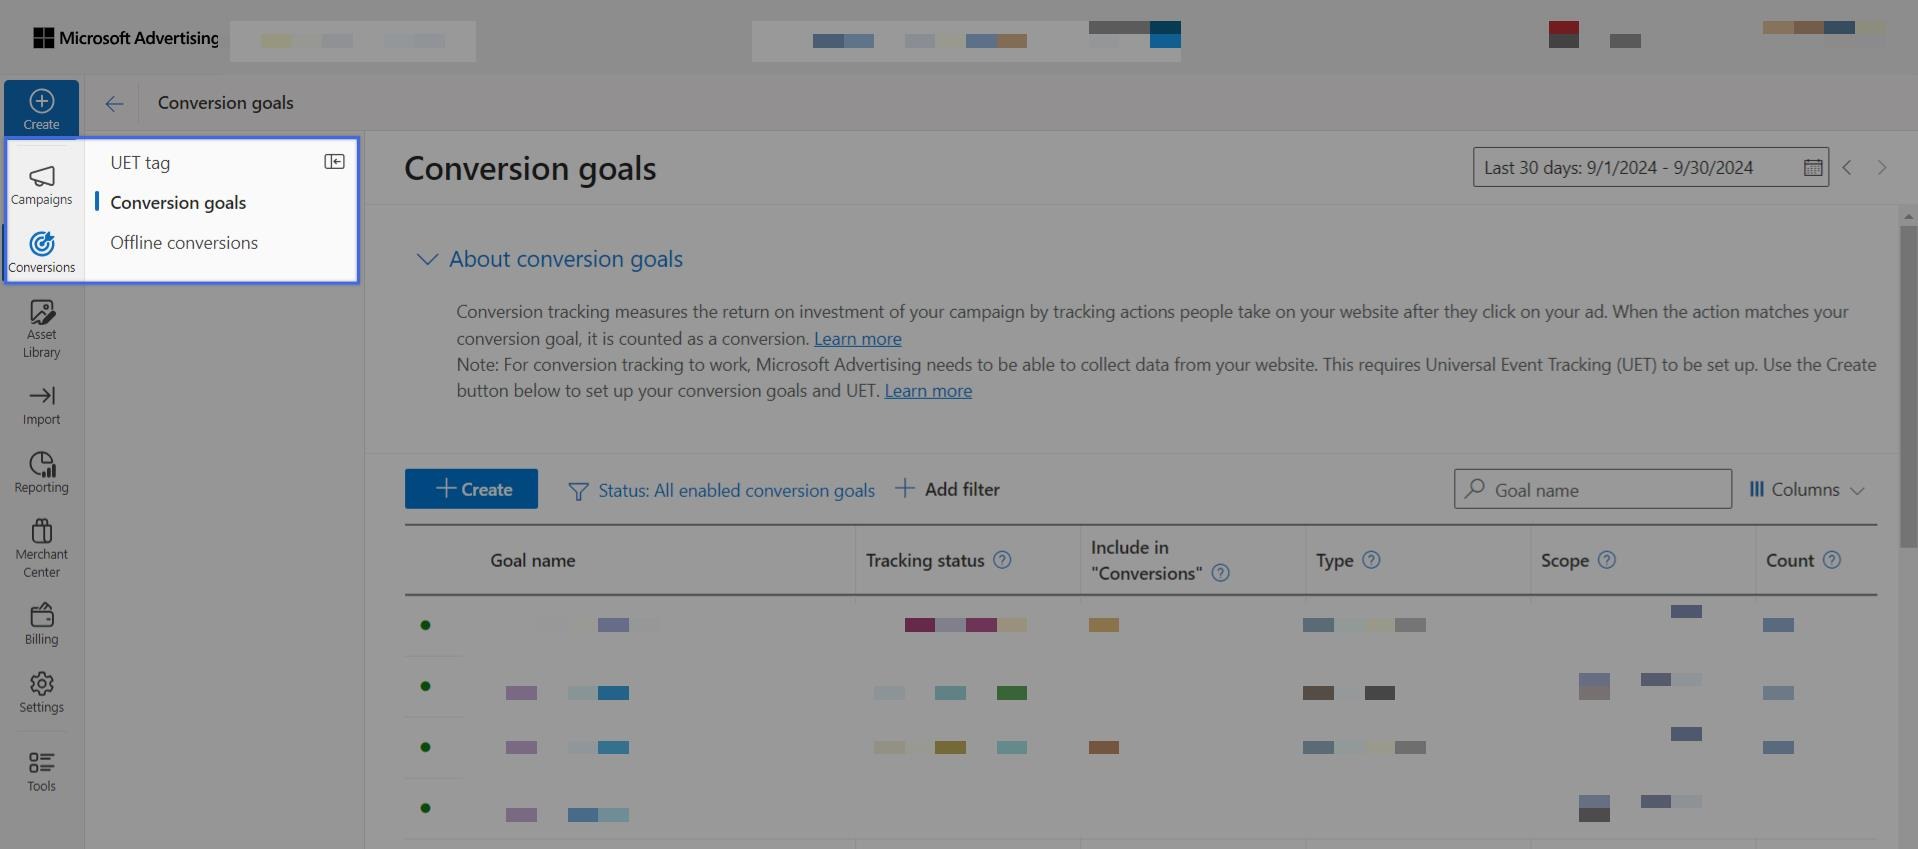
- Click on Create.
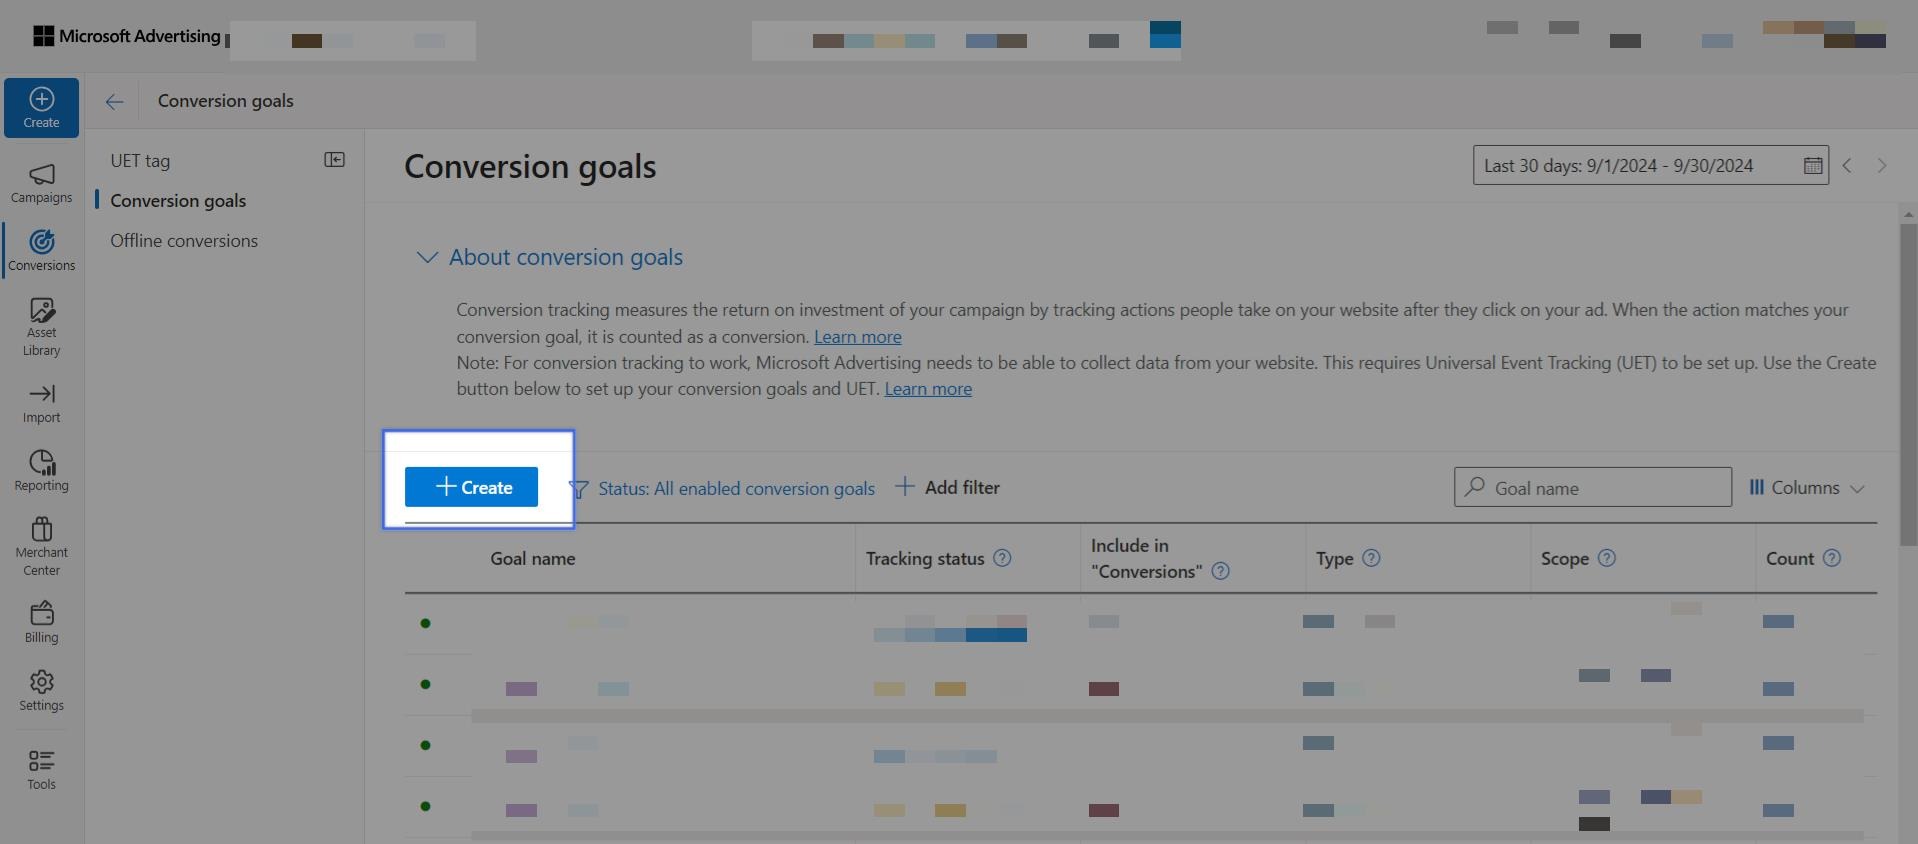
- Select the type of goal you want to track. The most common options for Shopify stores include:
- Purchase: Tracks completed sales.
- Destination URL: Tracks visits to specific URLs (e.g., your collection, product, thank you page).
For detailed steps you can read our guide.
A. For a Purchase goal:
Name your goal something relevant (e.g., “Shopify Store Purchase”).
Choose your UET tag from the dropdown menu.
Specify the currency and value for the conversion (for example, you can assign the exact value of a sale to this goal).
Decide whether you want to count All conversions (all purchases from a user) or Unique conversions (count only one per user).
Set a conversion window, which is the time frame after an ad click during which conversions are counted (usually between 7 to 30 days).
B. For a Destination URL goal:
Name your goal (e.g., “Thank You Page Reached”).
Select your UET tag from the list.
Enter the URL of your thank you page.
Set other parameters, such as conversion window and whether to count all or unique conversions.
Click Save to create your goal.
Important Notes: Set up Bing Ads Conversion Tracking
Regularly verify the UET tag: Use the UET Tag Helper extension or check the status in Microsoft Advertising.
Create multiple goals: Track a variety of valuable actions, such as purchases, email sign-ups, or visits to specific product pages.
When creating goals, you can mark important ones as conversions (which will show as ‘Yes’ in the relevant column) to be used for campaign optimization. Other goals can be used for insights and statistics without being marked as conversions.
It’s worth noting that sometimes multiple goals aimed at the same objective can be marked as conversions (for example, both an e-commerce purchase and a thank you page view for the same transaction).”
Use dynamic values: For purchase goals, use dynamic conversion values (based on the sale amount) to measure ROI accurately.
Use remarketing data: UET data can help you create remarketing lists and refine your ad strategies based on user behavior.