




We are more than happy to assist you in adding the Google Tag Manager container to your Shopify store.
Since Shopify does not have native integration with Google Tag Manager (GTM), there are two options available for you to benefit from:
- Adding the GTM container code directly to your Shopify store
- Using an app to set up GTM on Shopify.
Before the question comes up, let’s answer it: Yes, you can set up GTM on regular Shopify plans as well; it is not exclusive to Shopify Plus. We provide comprehensive video and text tutorials covering the following methods:
Method 1: Install GTM on Shopify Without an App
If you choose this method, you will manually add the GTM container code to your theme.liquid file and the
Additional Scripts section in your Checkout settings on the Shopify store. We have prepared a comprehensive step-by-step guide and a series of instructional videos for you.
Our GTM Installation on Shopify tutorial covers the following:
- Creating a GTM account.
- Locating your Google Tag Manager container ID/code.
- Injecting GTM into your Shopify store (theme.liquid, checkout.liquid, additional scripts).
- Adding purchase data layers on your thank-you page.
- Including product view data layers for single product pages.
- Creating tags, triggers, variables, and configuring conversion tracking through GTM.
By following our tutorial, you will have a clear understanding of how to set up GTM for your Shopify store. To access the tutorial and start installing Google Tag Manager on your Shopify store, please scroll and find the step-by-step guide below.
Method 2: Using an App to Set Up GTM on Shopify
You might find it technically challenging to properly install Google Tag Manager on Shopify, especially when seeking advanced integrations and reporting. Fortunately, there are Shopify apps available that can assist you in easily installing GTM on your store.
These apps not only simplify the installation process but also offer advanced data layers and a GTM container, eliminating the need for you to handle codes or hire developers or data specialists.
If you have plans to actively use GTM on your Shopify store, we highly recommend this method.
Step-by-Step Guide To Manually Installing GTM on Shopify
This is your step-by-step, detailed guide for setting up Google Tag Manager on your Shopify store – prepared by true experts who love to share!
Google Tag Manager (GTM) works great on Shopify – including non-Shopify plans. Setting up Google Tag Manager on Shopify isn’t a quick process, but there are several methods available. We will guide you through these methods with step-by-step tutorials.
You can do the setup yourself by following the tutorial provided below. Alternatively, you can use a Shopify Google Tag Manager app which will handle most of the process for you. Both options are perfectly fine, depending on your needs.
In this method, we will guide you step-by-step on how to manually install Google Tag Manager (GTM) containers in your Shopify store.
We will also carry out debugging at the end of the section to ensure the GTM container is correctly placed.
We have made a dedicated YouTube tutorial video that you can watch at the end of this section.

Shopify-GTM
How to Install Google Tag Manager without Shopify Plus [no-app]
Let’s begin setting up GTM on your Shopify store. Don’t forget to check the bottom section of the article where we will use the data layers, GTM tags and triggers to enhance and complete your setup. That will allow you to set up conversion tracking through Google Tag Manager as well.

 Easy
 15 min

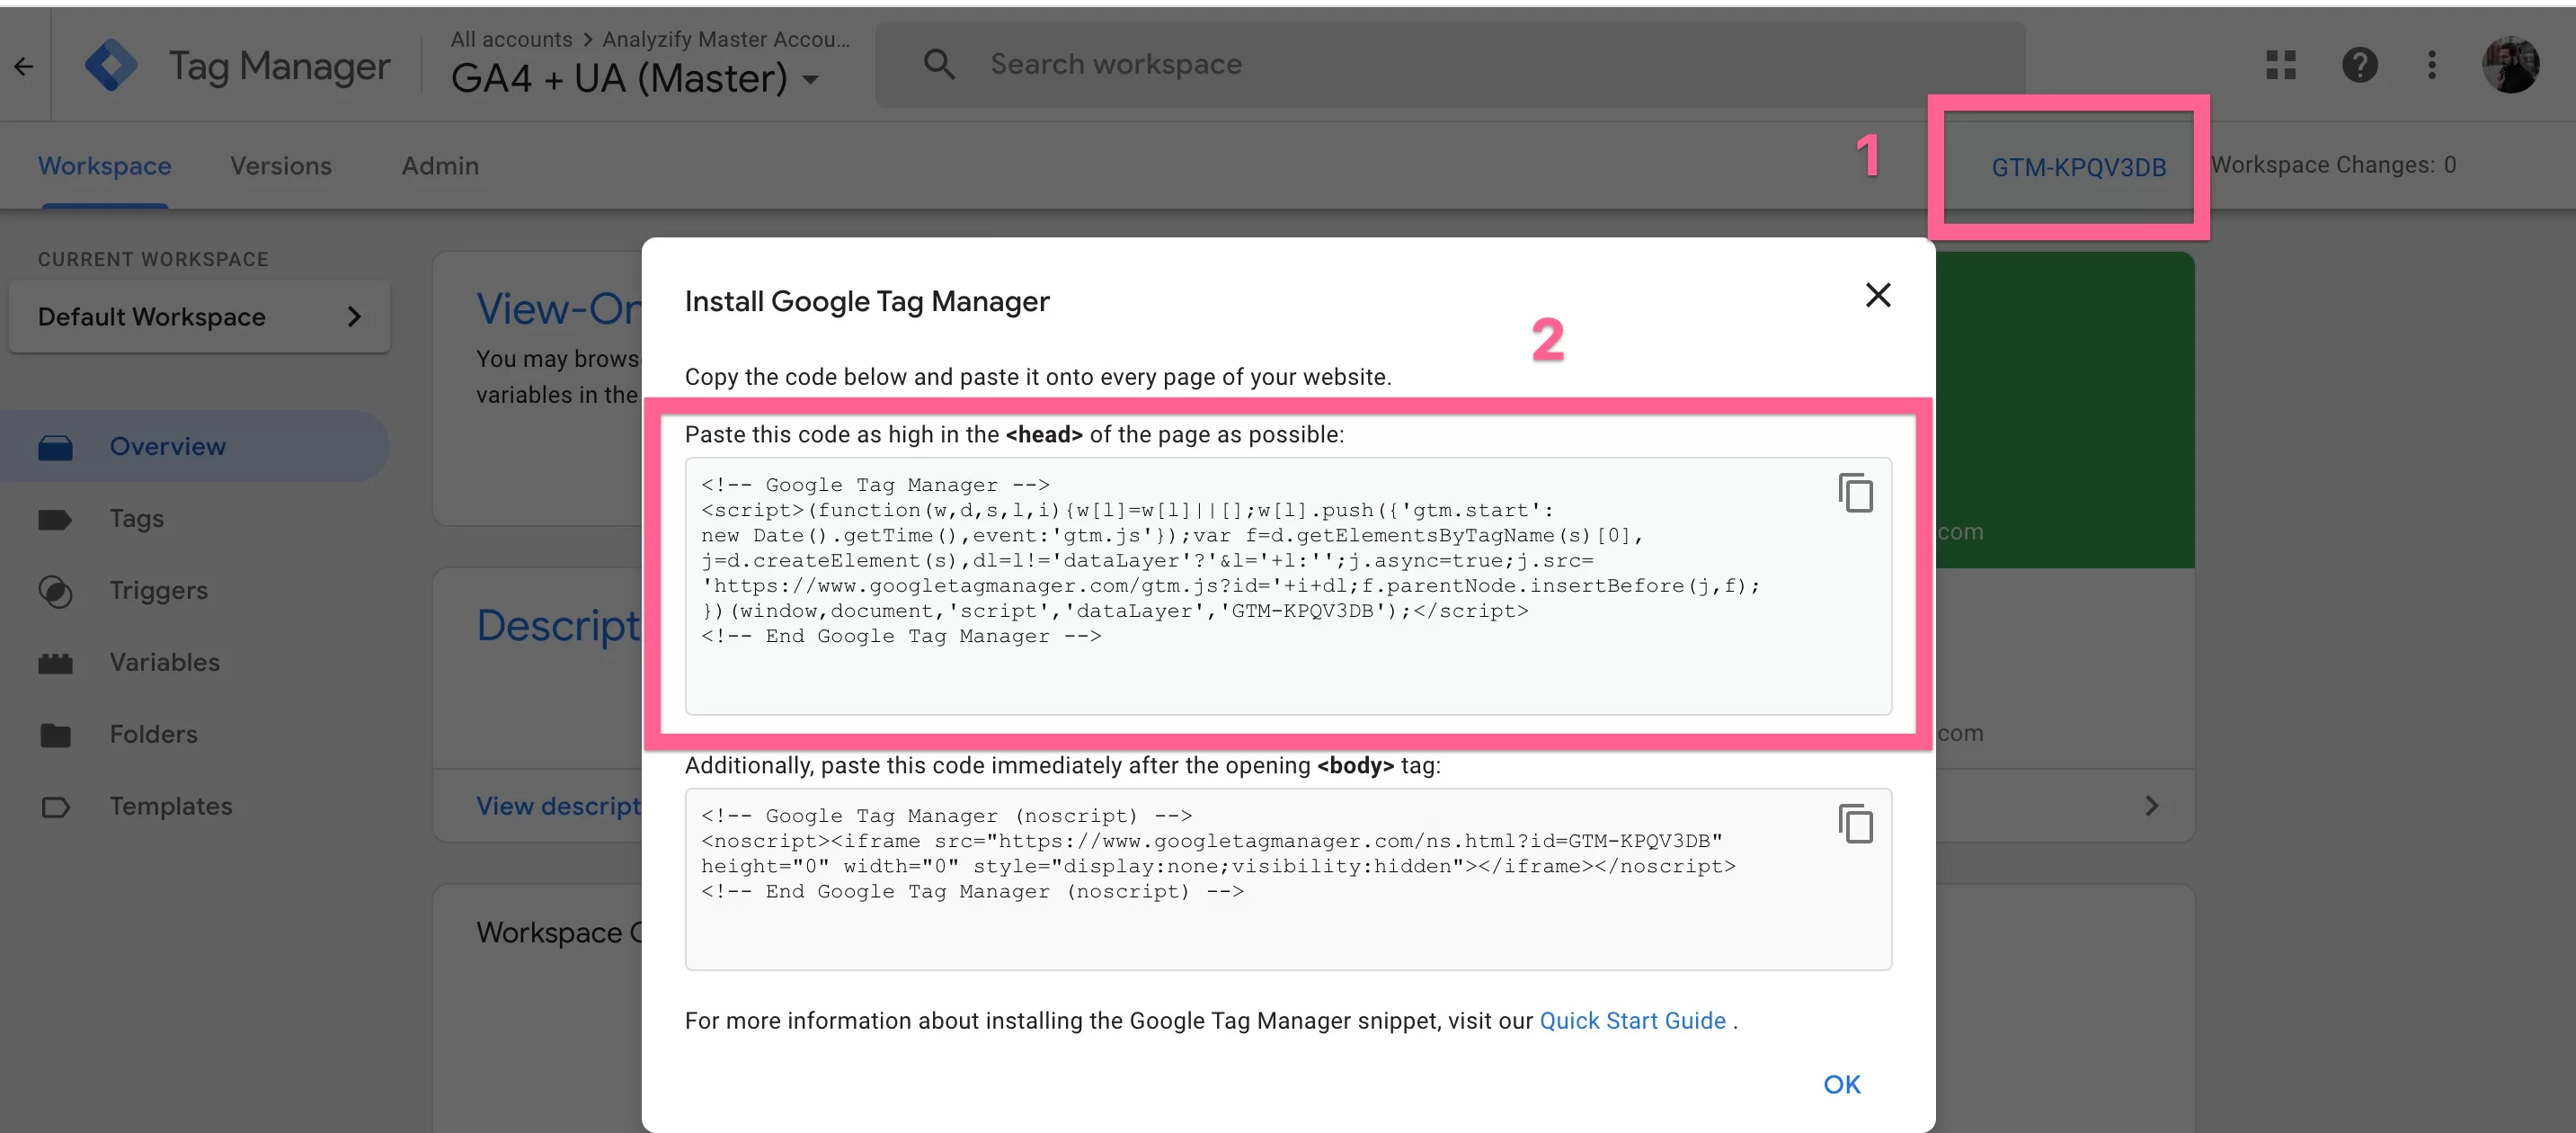
Let’s get your GTM container code.If you don’t have an account yet, you can follow this tutorial to create a GTM account , and then come back here. Go to your Google Tag Manager account. Click on your GTM ID on the top-right corner of the screen (labeled as #1 in the screenshot). Copy the first part of the code.
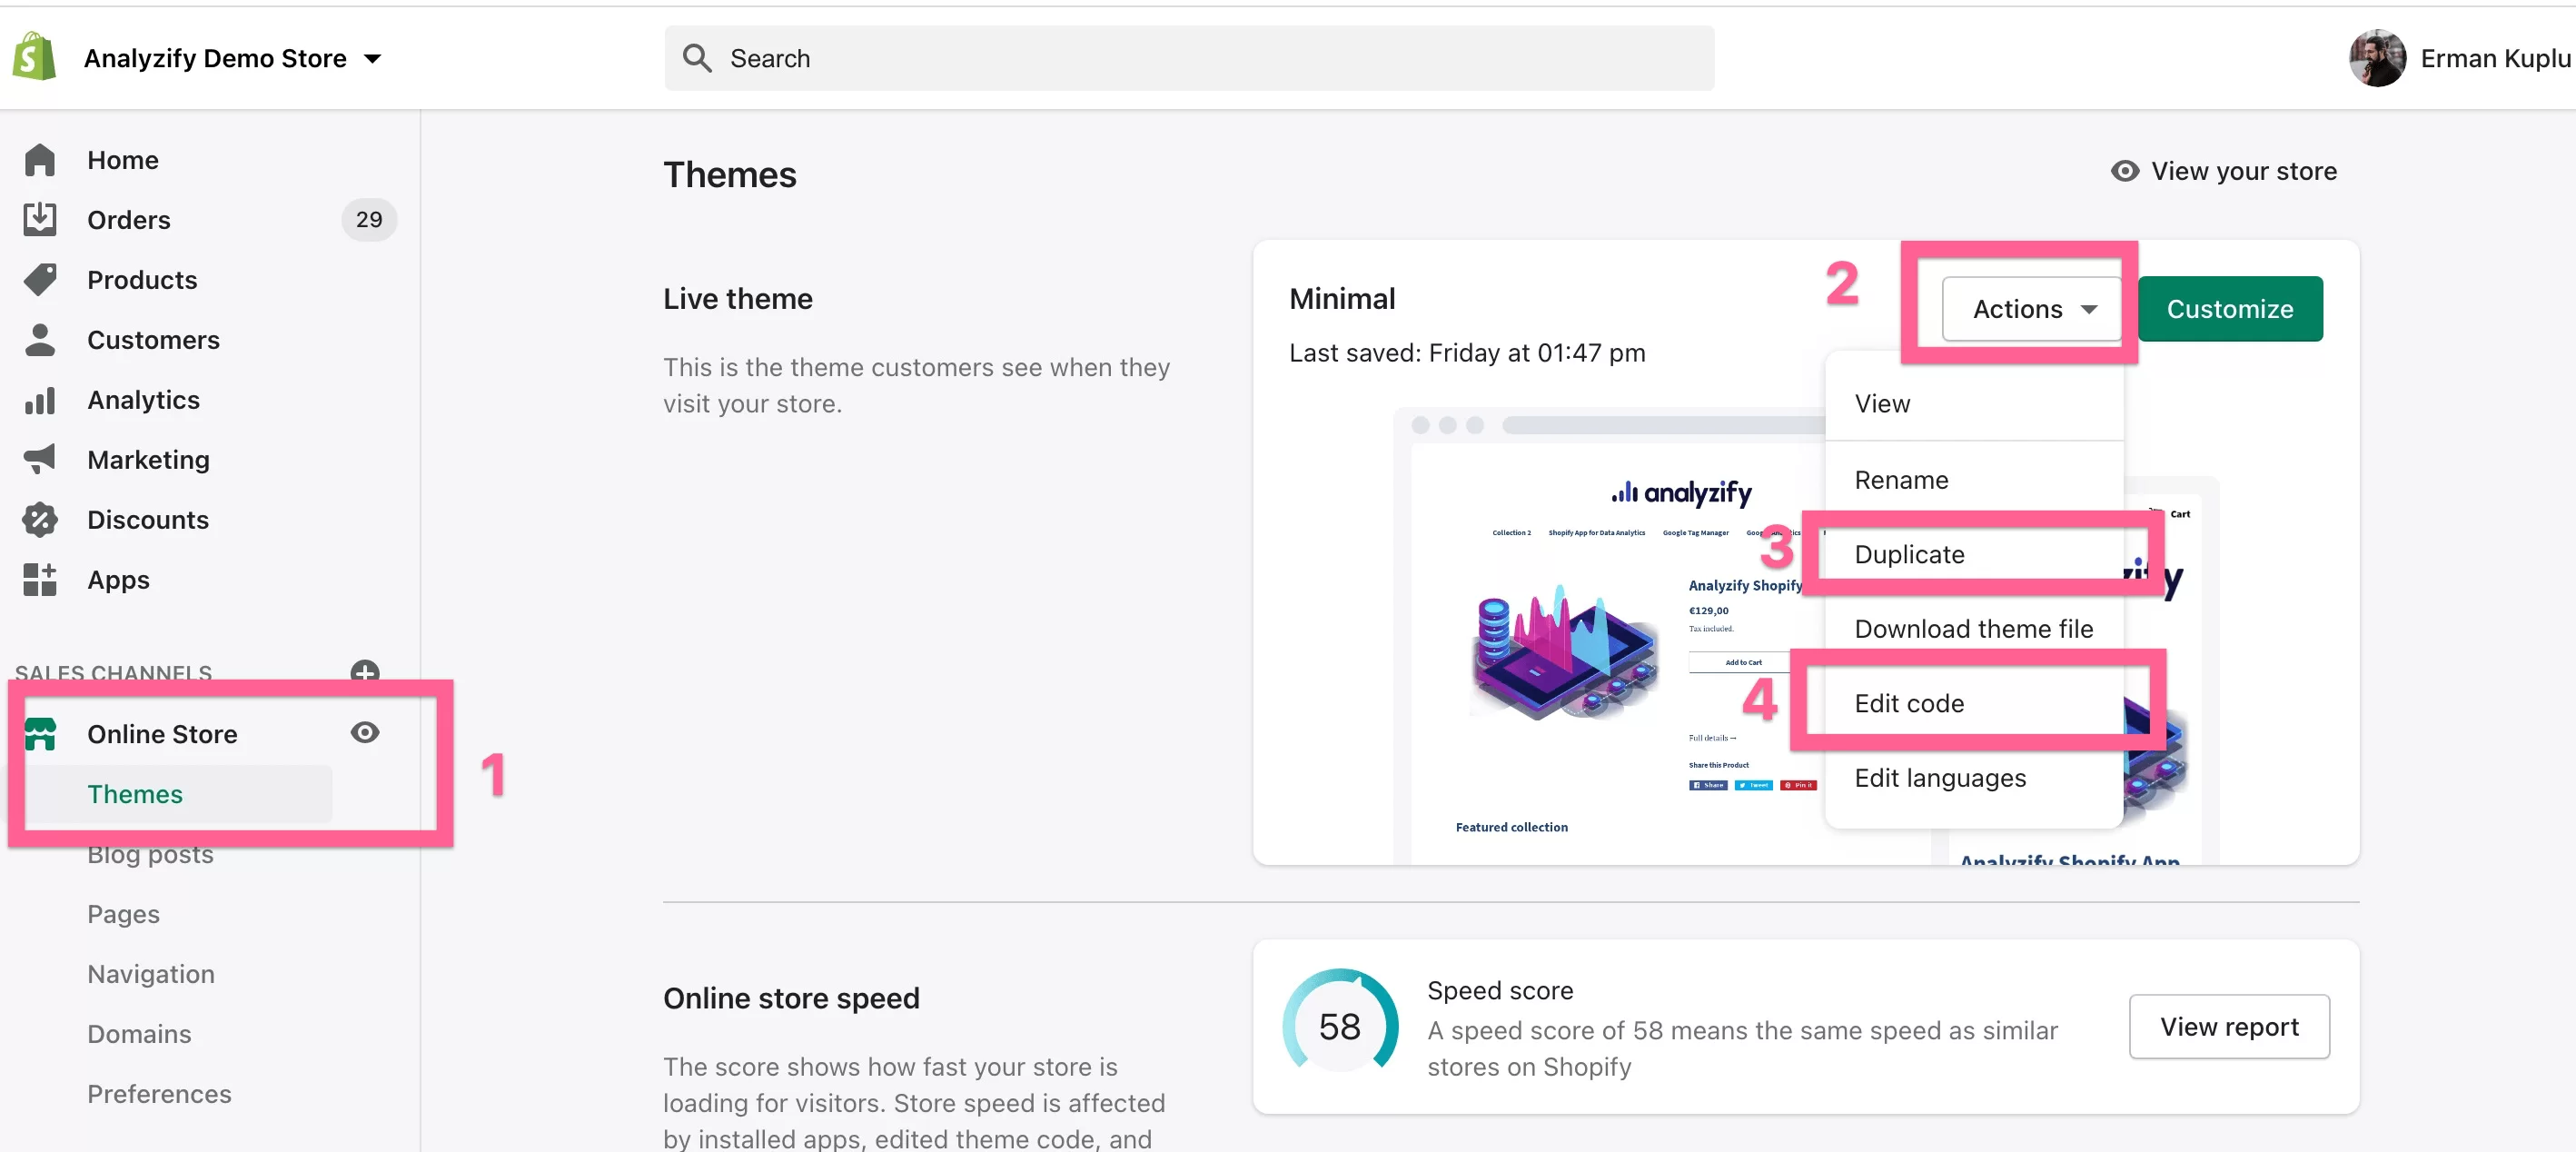
Go to your Shopify Store Admin > Online Store > Themes. Click on the three dots near your current (live) theme. As we will have to edit your theme files, it is a good idea to start by duplicating your theme so you have a backup. Duplicate your current theme so that you have a backup option to revert back to in case something goes wrong. After duplicating, click the three dots > Edit Code.
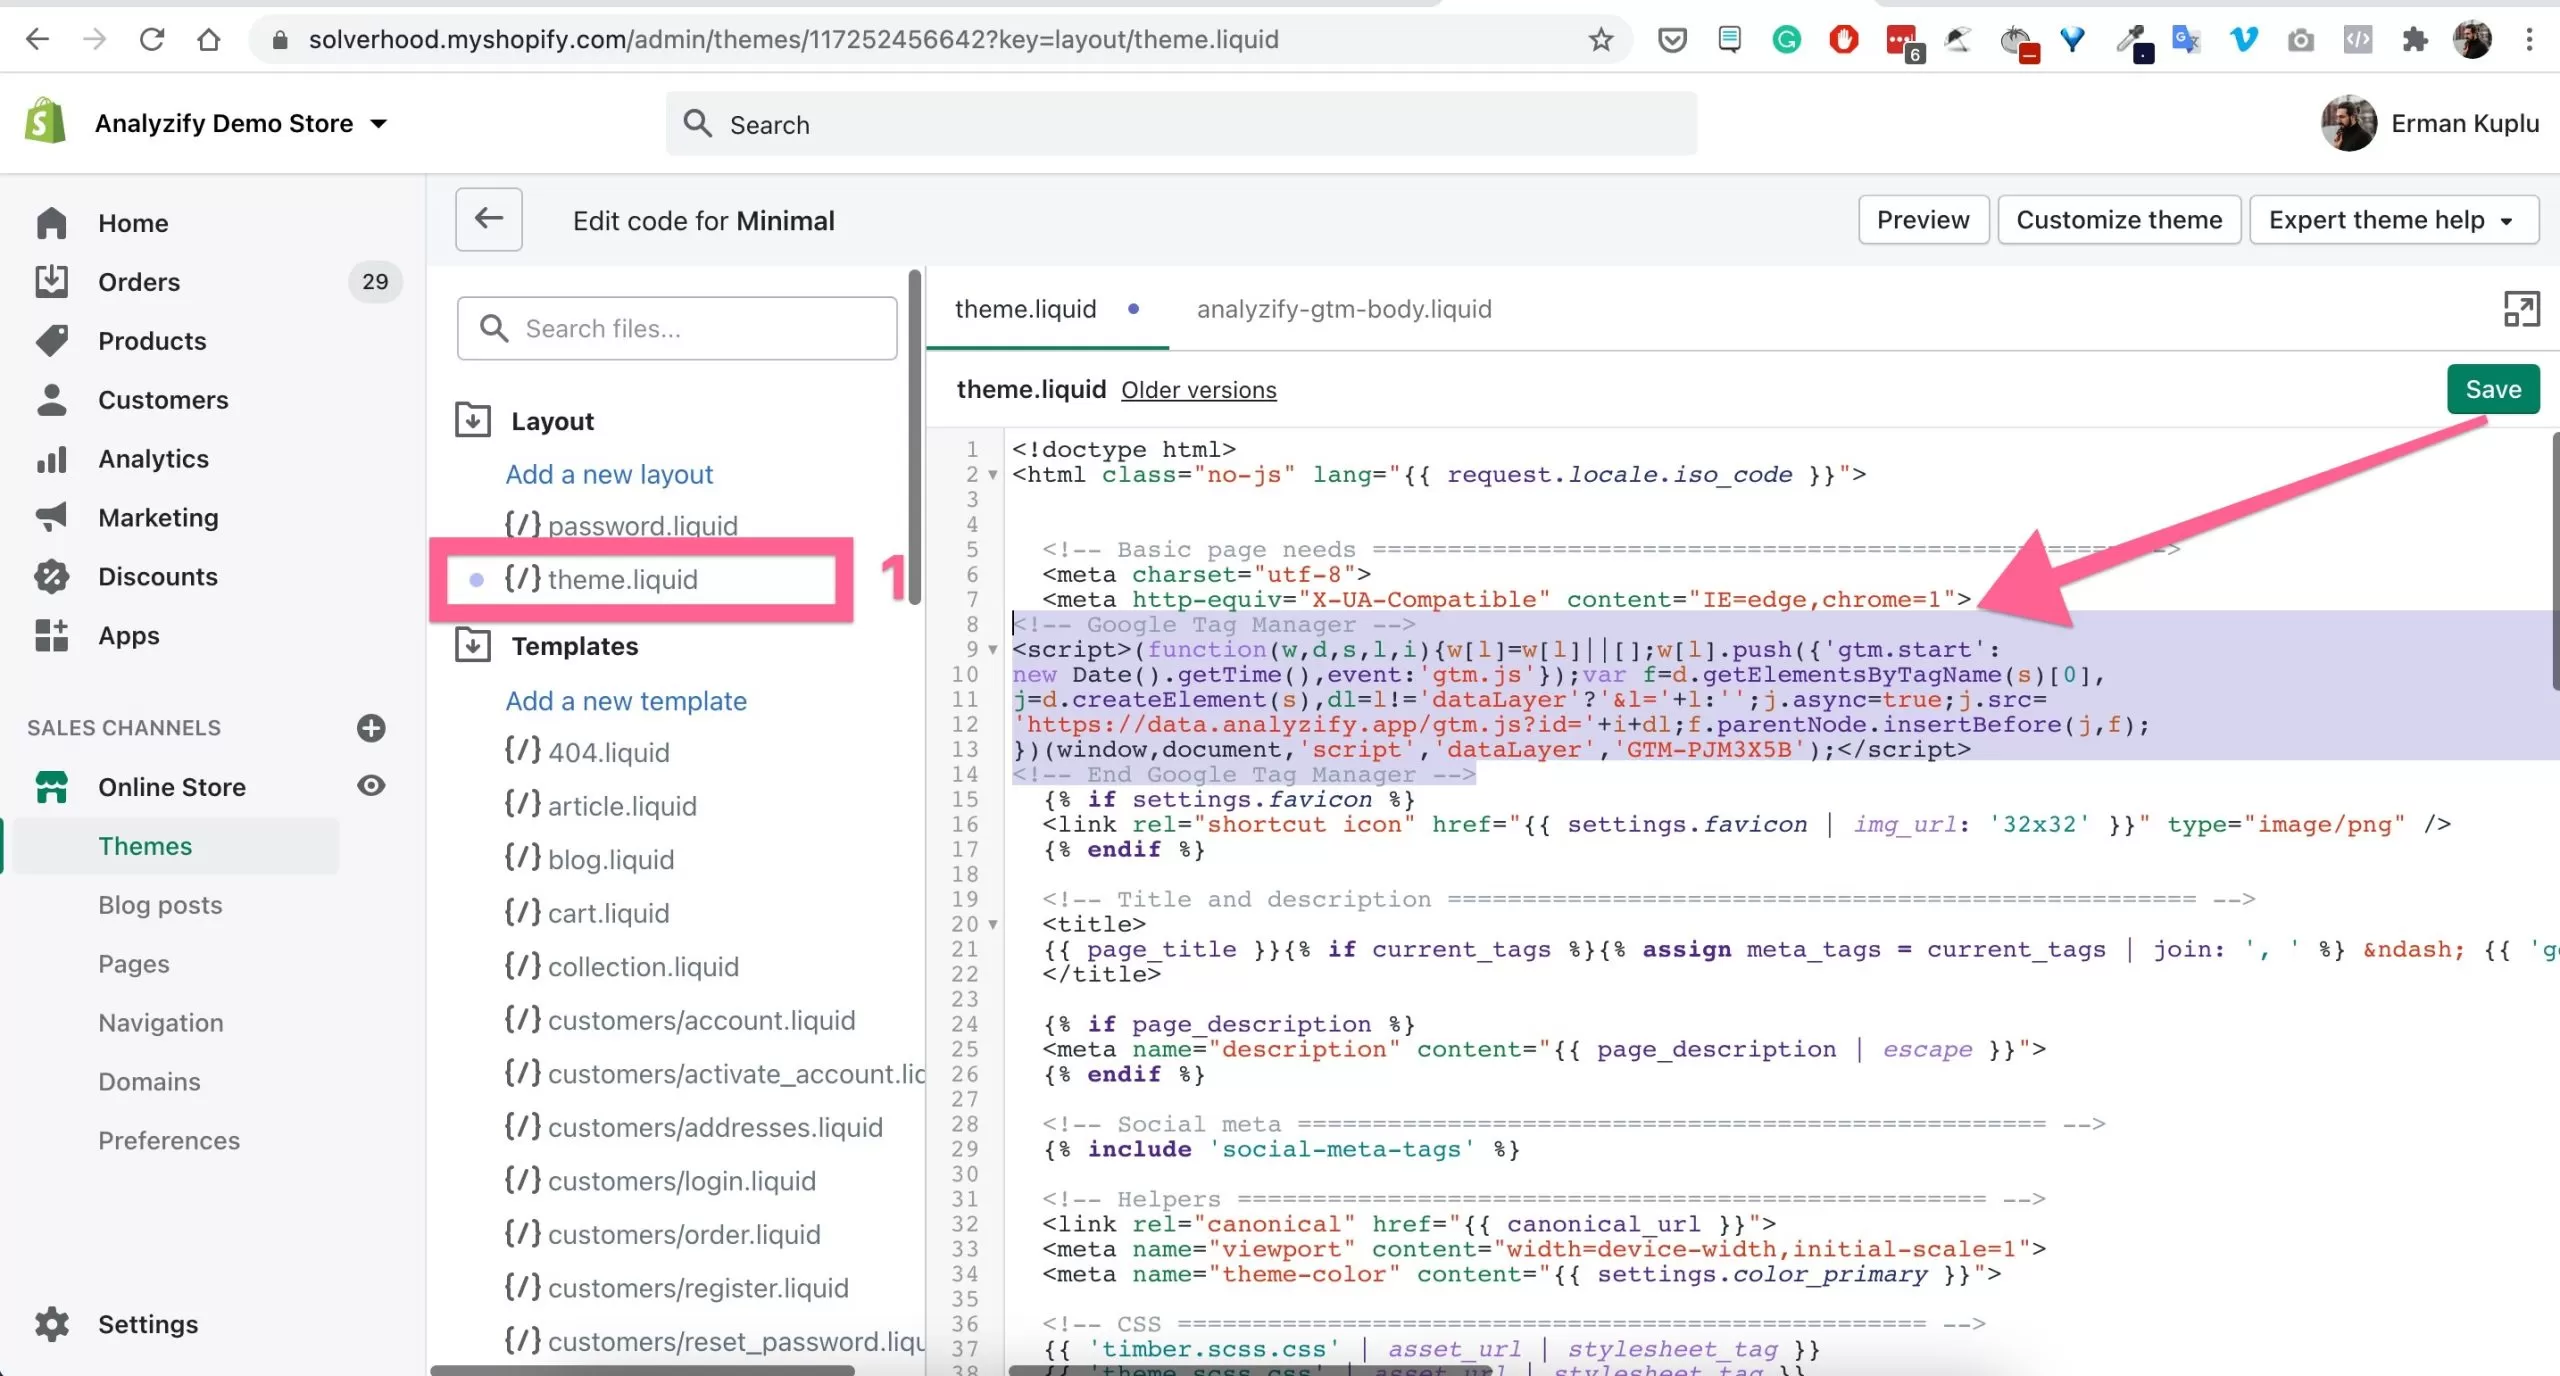
After clicking edit code, paste the GTM code you copied earlier under in the theme.liquid layout.
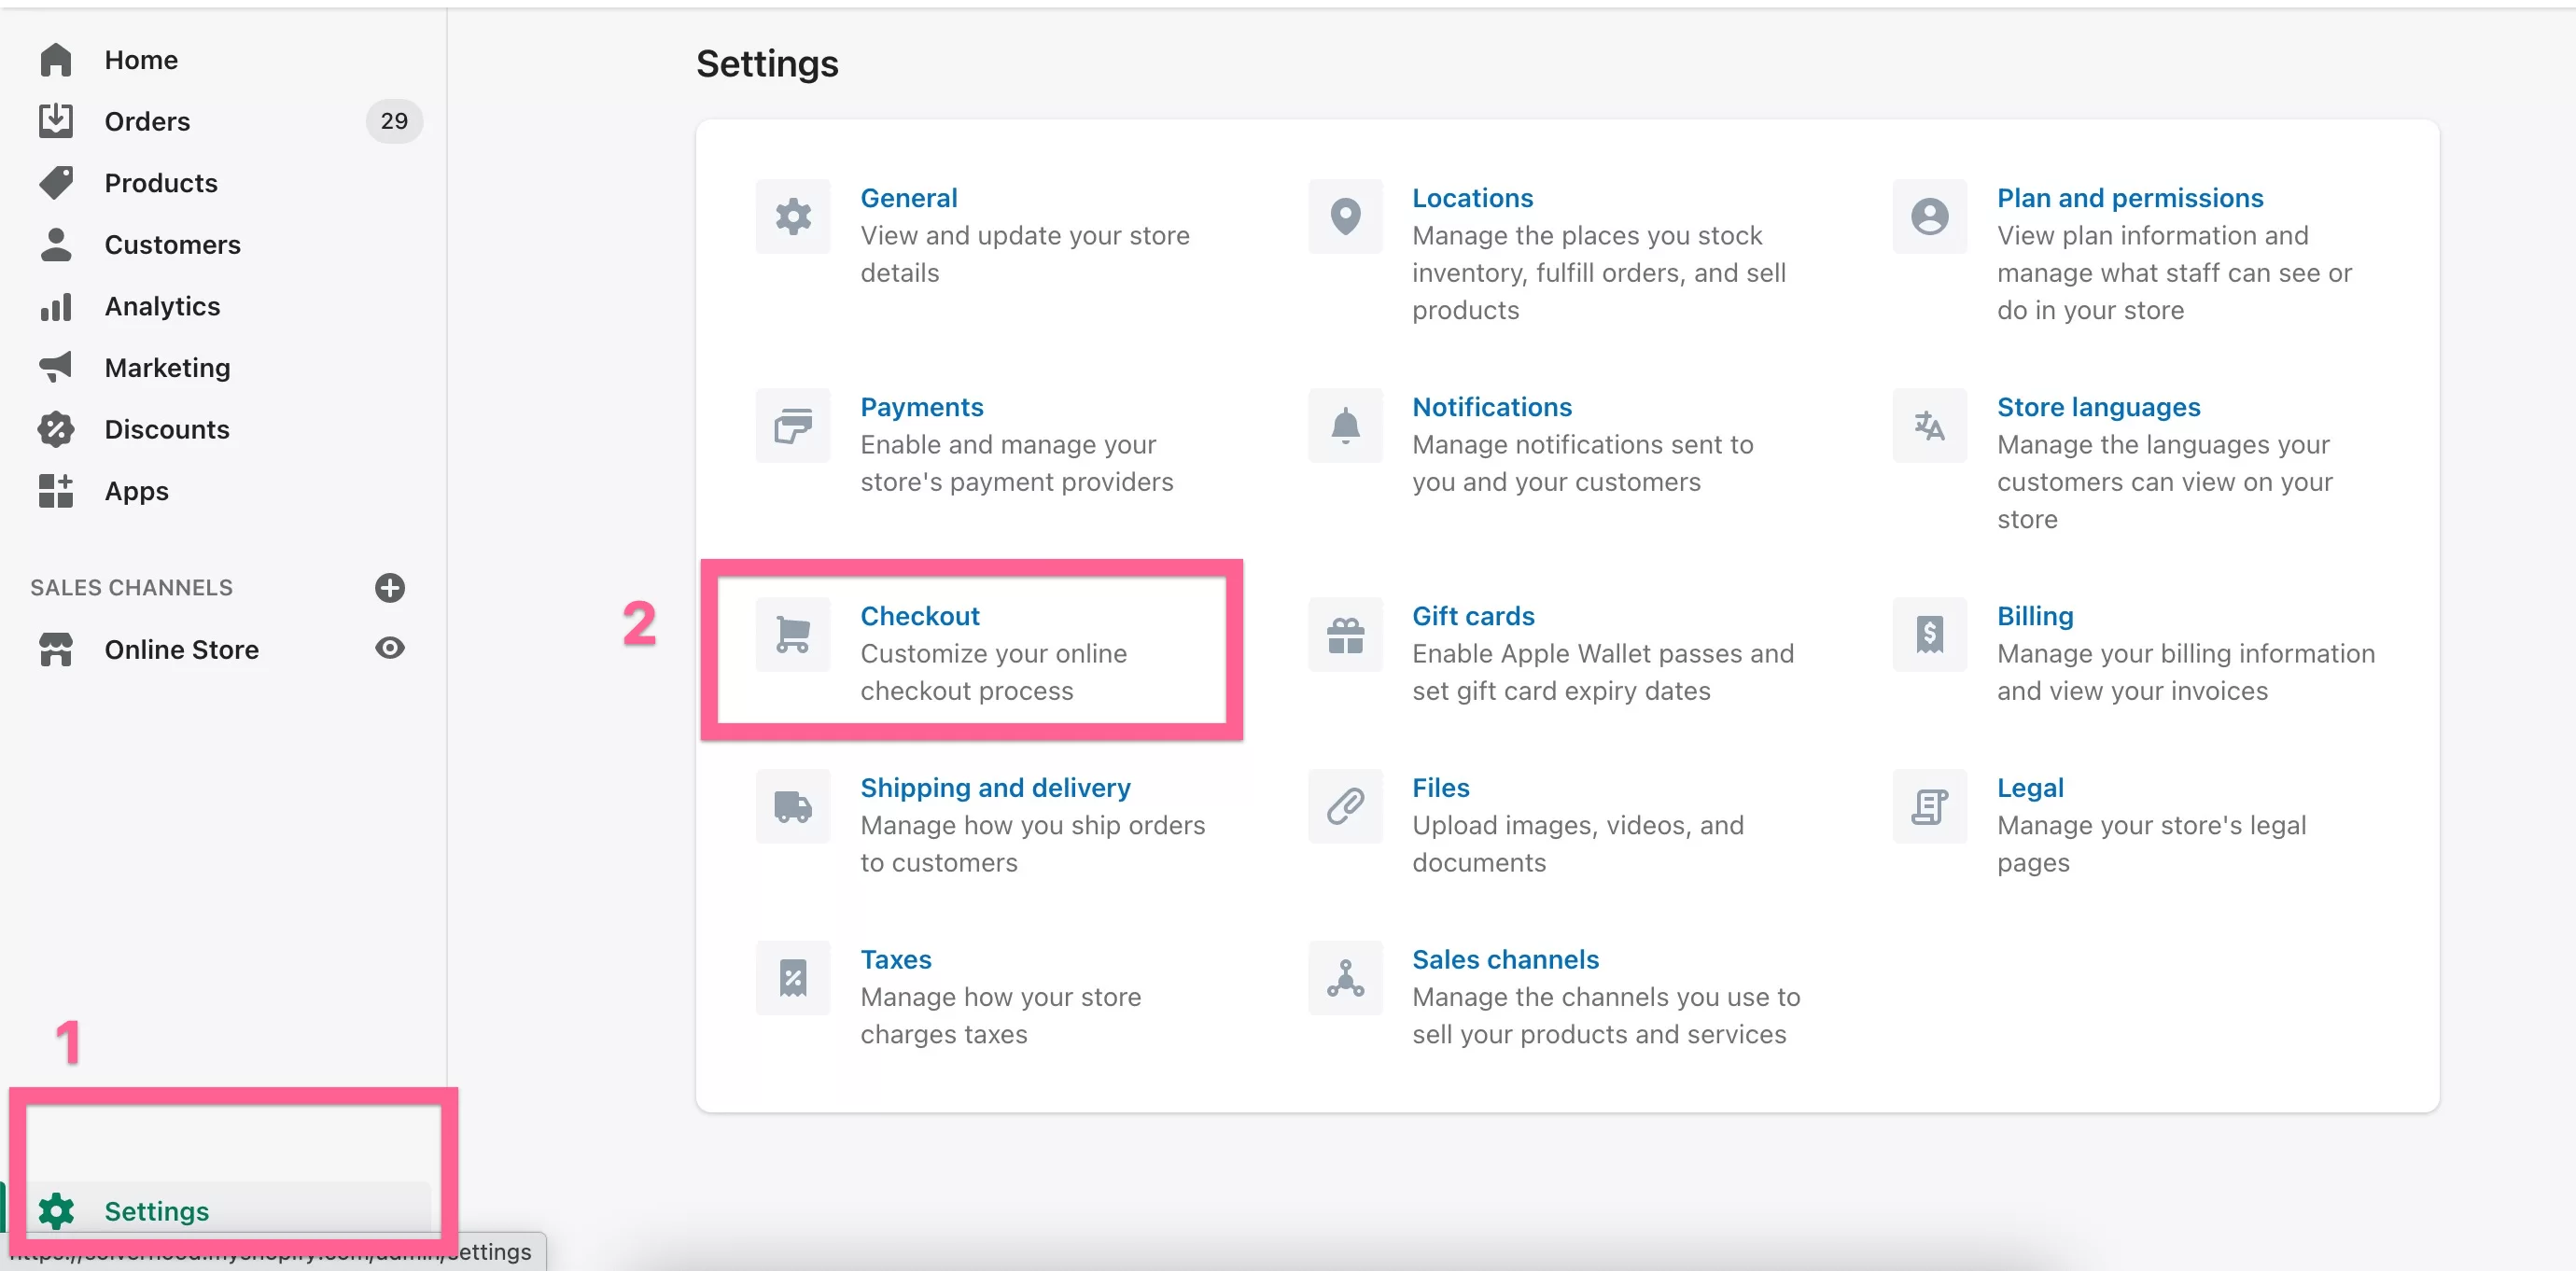
Unfortunately, Shopify doesn’t allow us to add code to the Checkout page unless you have the Shopify Plus plan. So, the GTM will not work on your checkout and cart pages. That being said, it is not that big a deal. What matters most is the “purchase completed” and we will now add the code there.
Go to Shopify Admin > Settings > Checkout
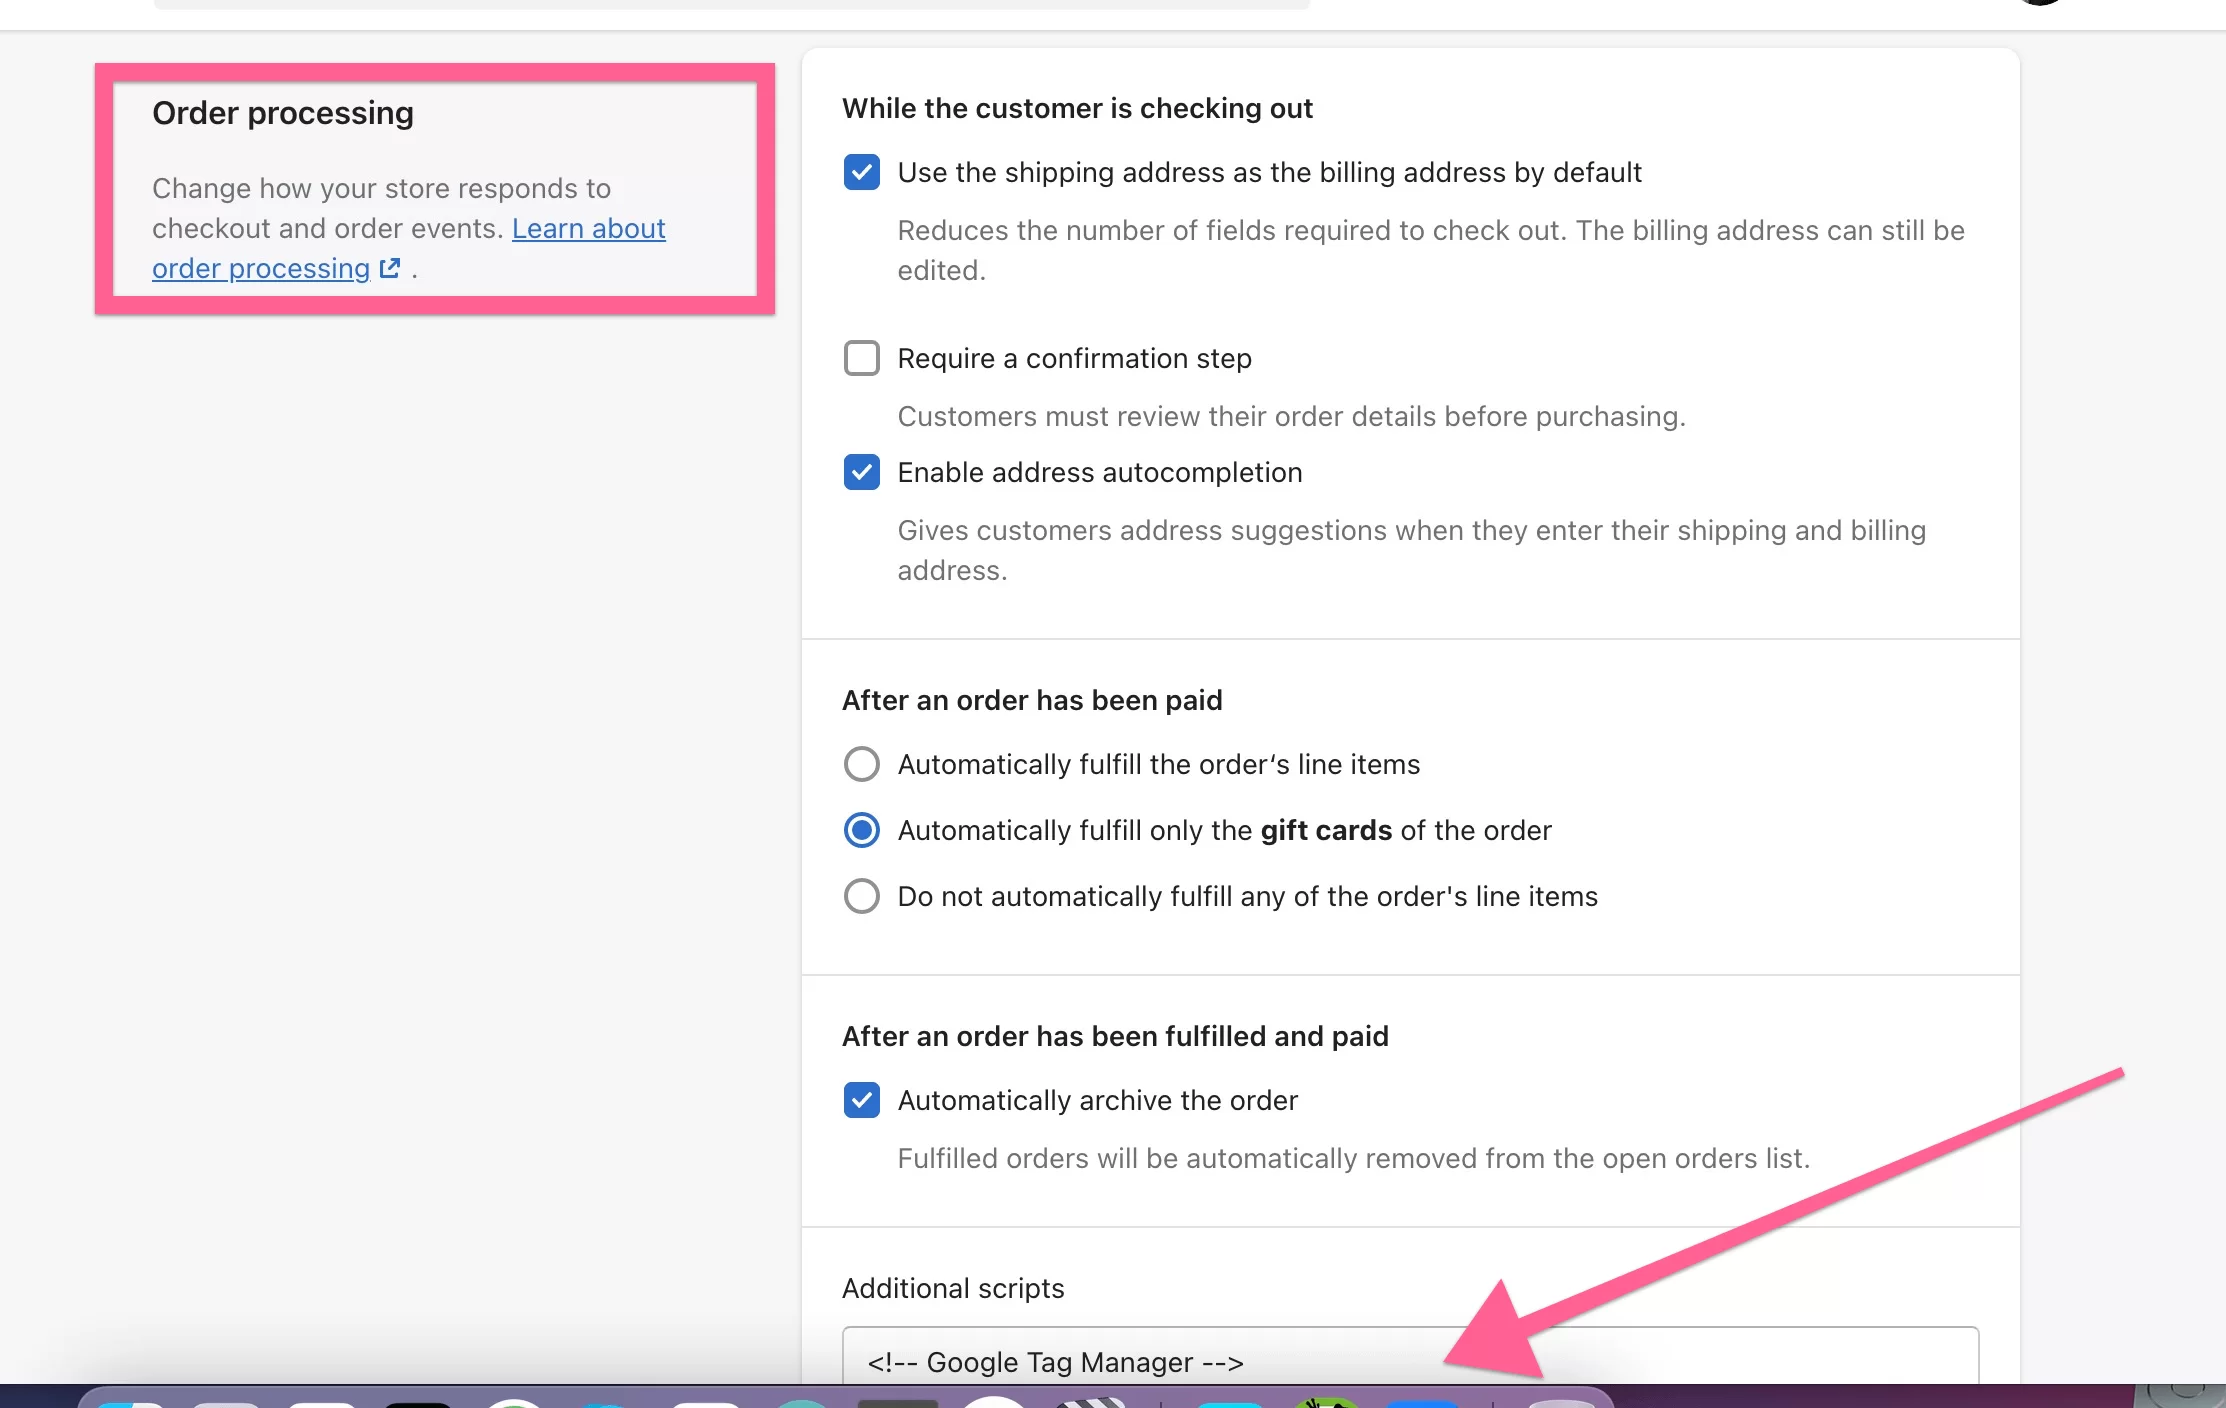
Keep scrolling within Checkout, and find the section called Order status page. Just paste the same GTM container code here and save it. If you have any other codes in this section, you don’t need to modify them; just add the GTM container code at the top. This will allow the GTM container to work on the thank-you page. In this way, you can track sales and conversions.
If you are on a Shopify Plus plan, you don’t need to do this. Just add the GTM snippet into the checkout.liquid file.
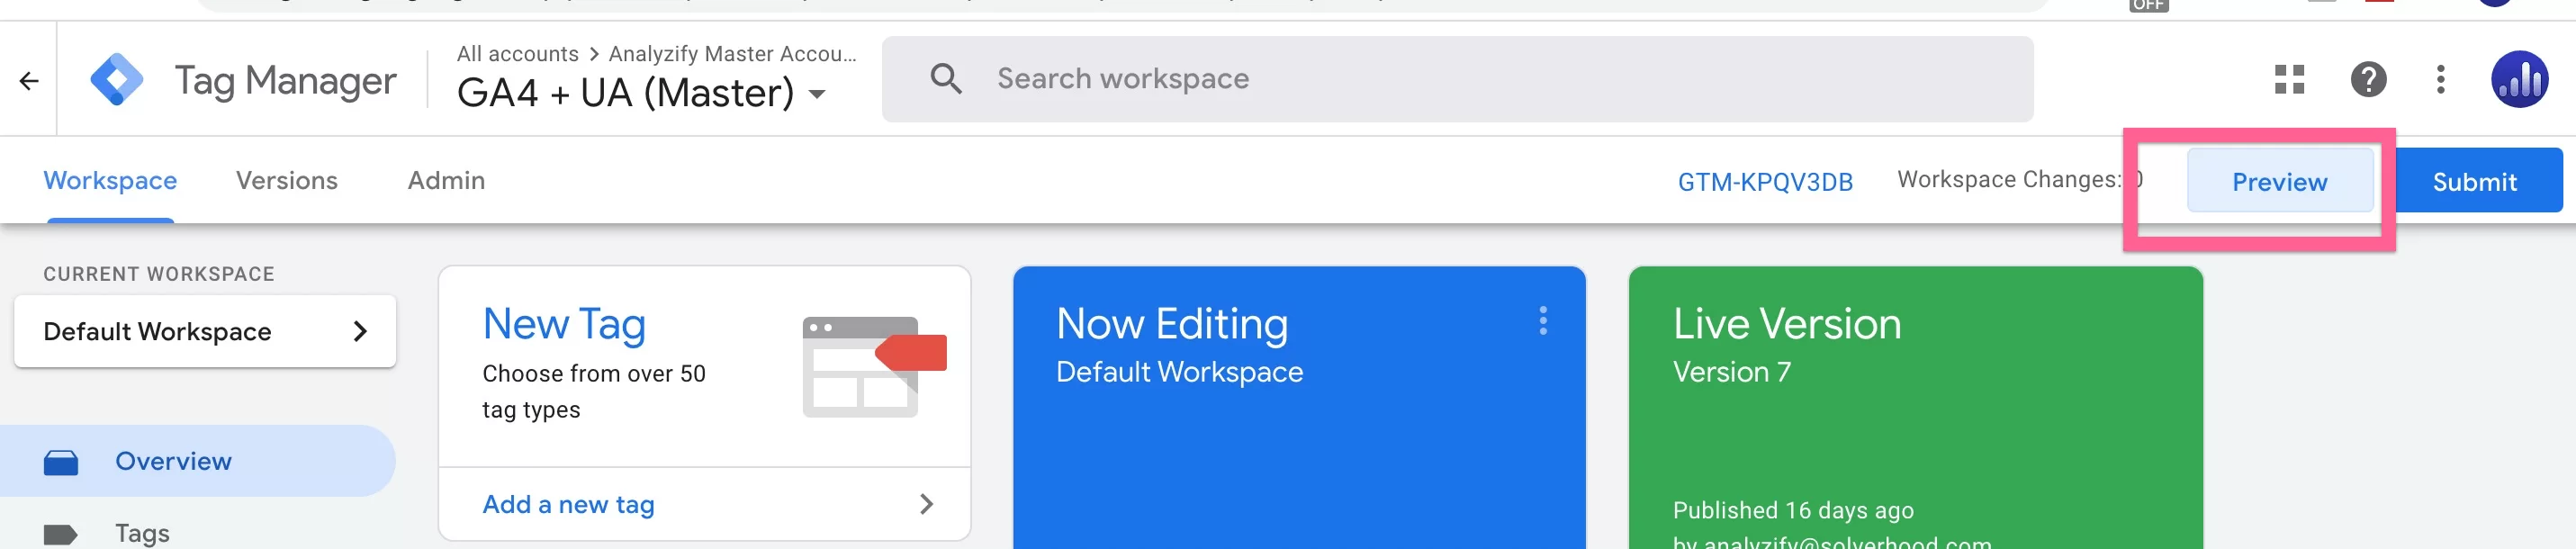
Now it’s time to verify your GTM - Shopify setup. You can use GTM preview mode to check if your GTM tag is installed correctly in your store or not. Go back to your Google Tag Manager account and click Preview. If your GTM container is empty, it will ask you to publish the preview because you just created this account. Publish, approve and move on.
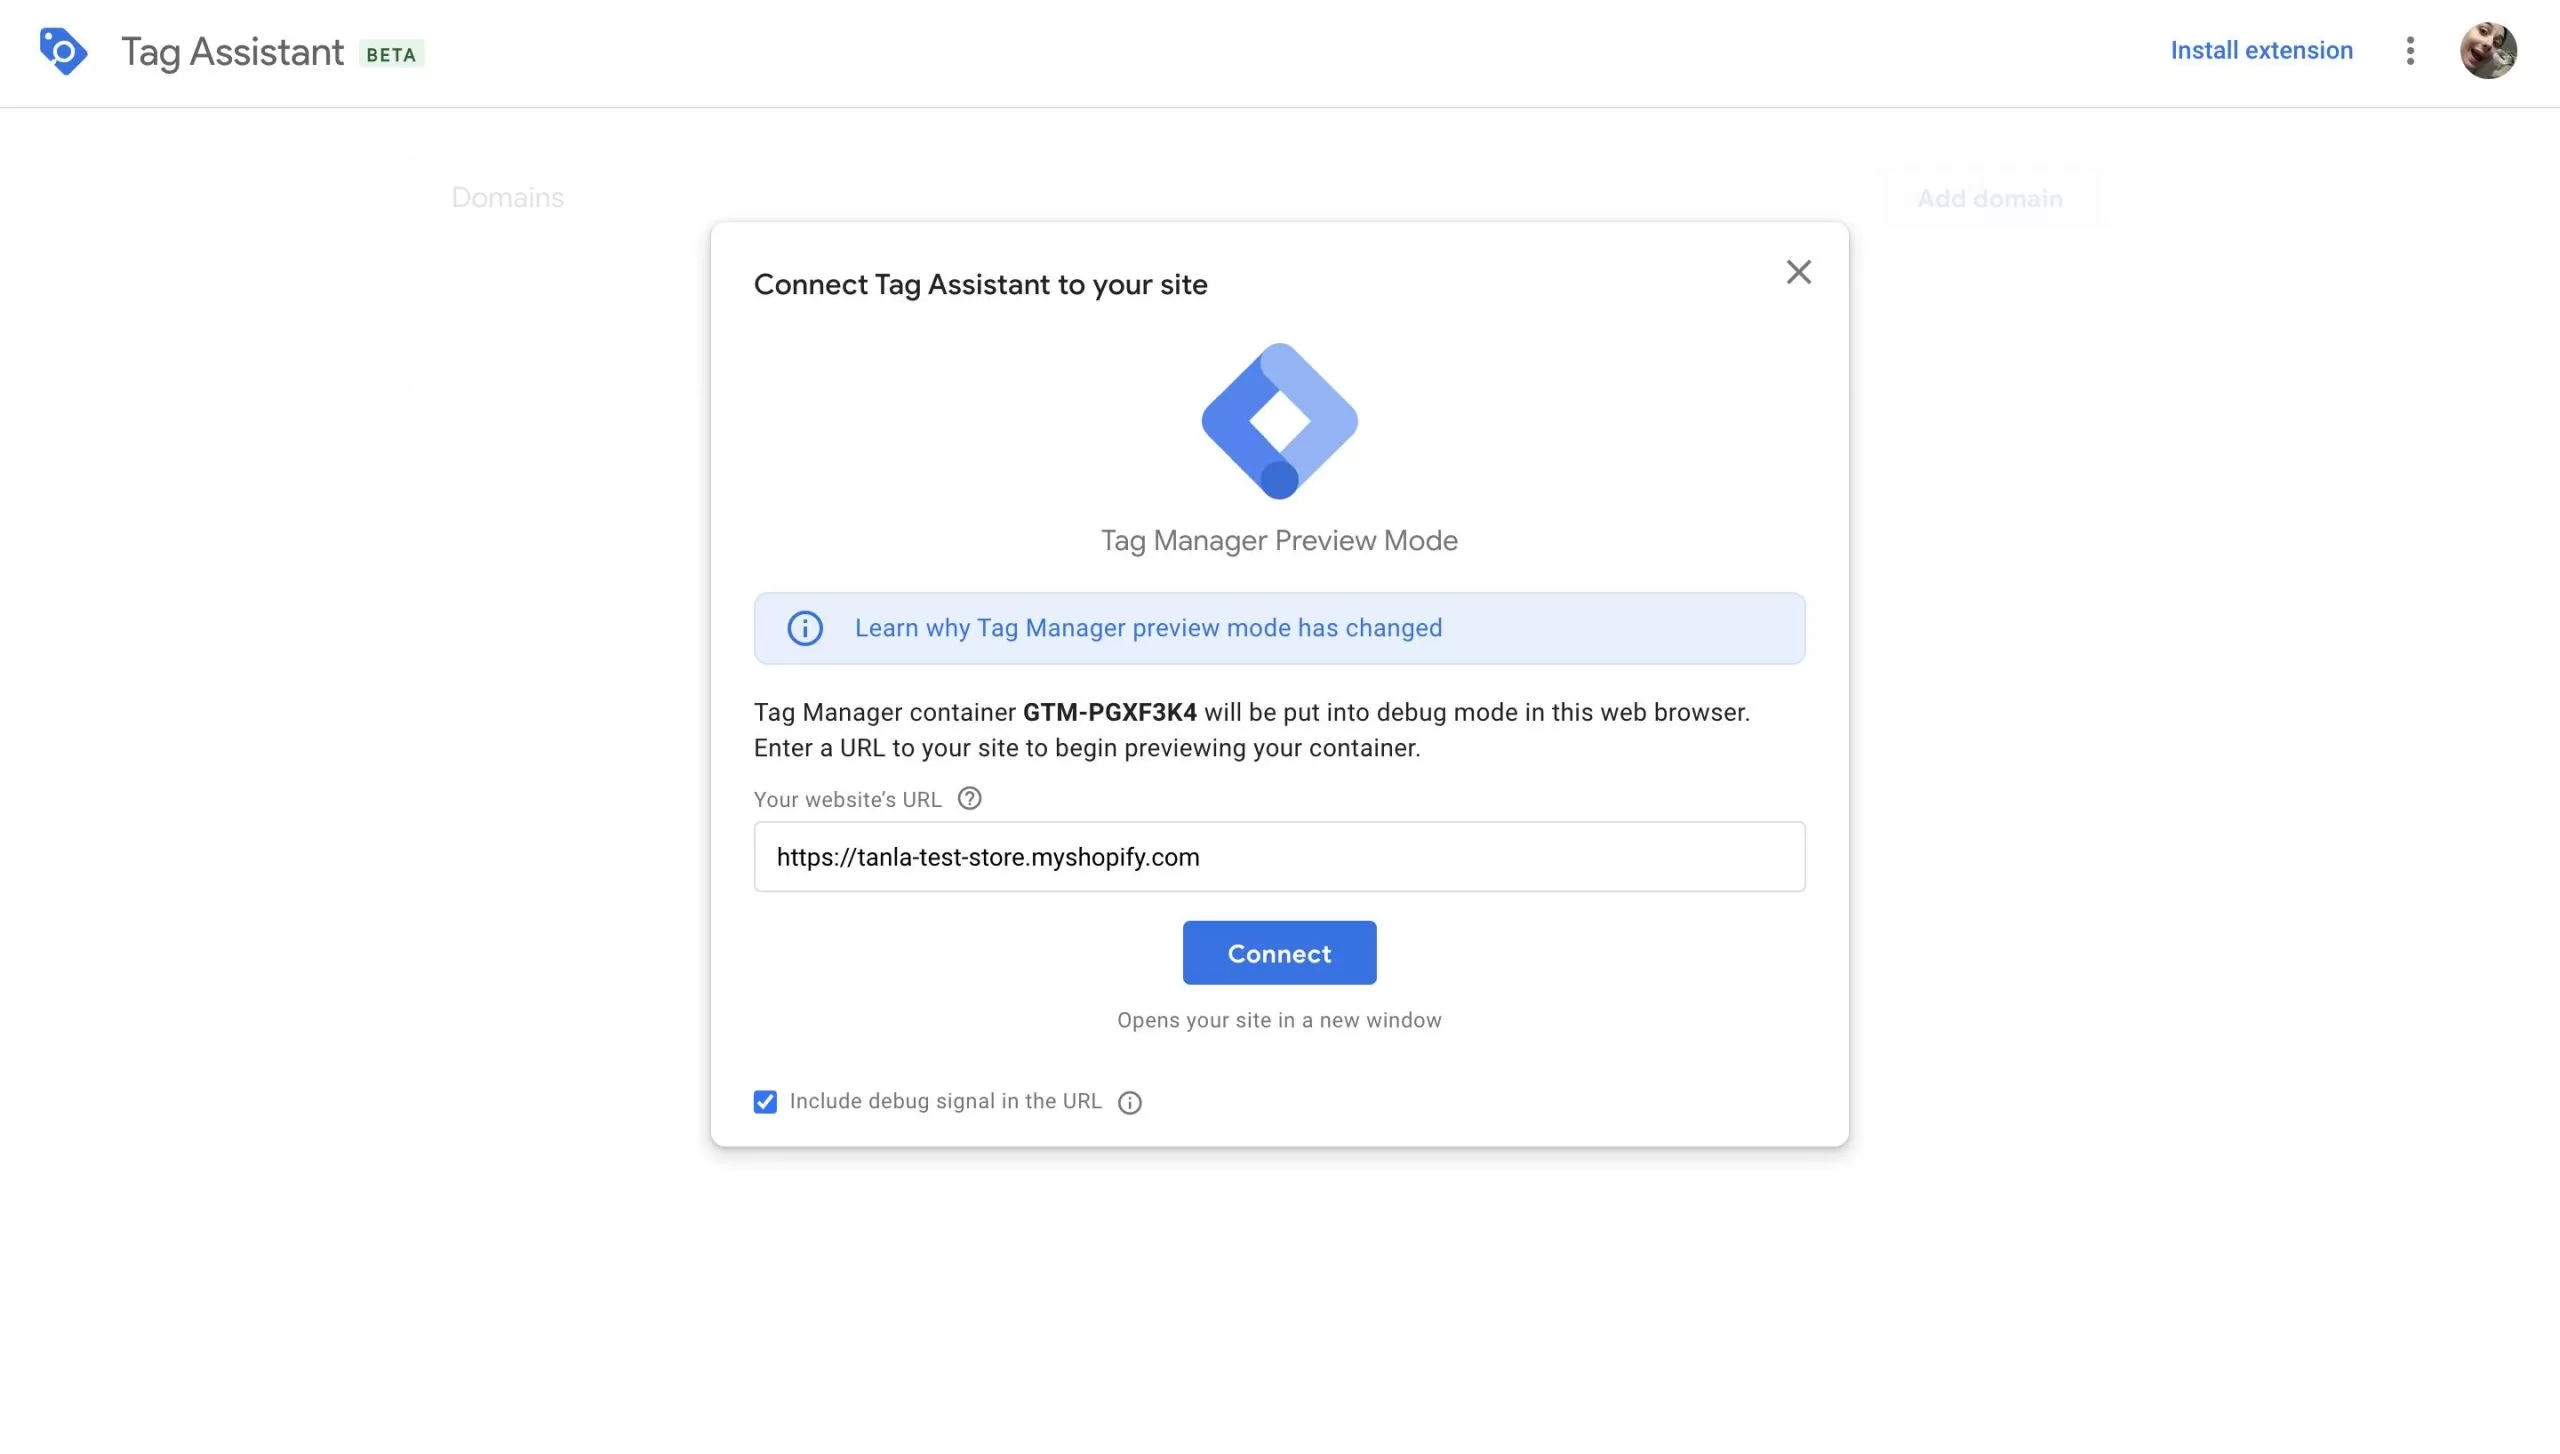
Type in your store’s URL and click on Connect. If you receive the “Connected” pop-up notification or see “Debugger Connected” in the bottom-right corner, it means that you have successfully installed Google Tag Manager.
Congratulations! Your GTM setup is complete!
Easy15 minNote: If you are using a Page Builder App that has created new liquid files in your theme; you will need to paste the GTM container code in those pages separately.
Otherwise, GTM will not be visible on those pages. Make sure to visit all of your pages and see if the GTM container is placed correctly. We will conduct a debug at the end of the tutorial.
You have now completed setting up Google Tag Manager on your Shopify store.
However, adding only the GTM container won’t do anything by itself. You will also need to add tags, triggers, variables through Google Tag Manager.