Google Shopping ads are the type of advertising space that Google offers you to promote your online and local inventory, increase traffic to your online or local stores, and find new leads.
When your users search, they see your products together with similar products of your competitors. This shows that Google shopping is actually a comparison shopping engine. In this shopping area, you can attract the attention of your potential customers by showing your difference against your competitors.
If you’re wondering how to make a difference, the answer is simple: advertising content. Shopping ads are visual ads that are shown to online shoppers with additional information such as headlines, prices, shipping, and reviews. In other words, attractive visuals and accurate information will increase your chances of reaching qualified customers with a high potential to purchase.
Google shopping has now become one of the most popular shopping channels. This shopping engine, which is used in roughly 40 countries, is the apple of the eye of e-commerce businesses.
Advantages of Using Google Shopping Ads
Take your place at the top
According to research, users who do research are more likely to click on the first positions in the search results. For this reason, many advertisers target top-of-the-page positions to highlight their brand and products.
However, if you haven’t created shopping ads yet, you won’t always be able to get to the top as Google allocates the first place to shopping ads in many countries. Then, search text ads and organic results come. If you want a user to see your product first when they search, you can choose shopping ads.
P.S. You can show your product or brand in both ad slots by using Shopping ads and text ads at the same time. This way, you can increase your chances of getting clicks.
Get more qualified traffic
In-text ads or organic results, you may try to impress customers with words alone. Shopping ads have great powers, though: images and price. When a user who really wants to buy searches on Google, they come across shopping ads.
While confirming the product from the shopping ads by looking at the images, they also compare the prices. After making a selection, the user clicks on the ad and goes directly to the product’s page. This user, who has acquired basic information about the price and product before the click, can have a high conversion rate. Users from a shopping ad are also a great data source for your remarketing audiences.
Get a wider reach
You can only have 1 ad slot per domain for text ads. The opposite is true for Shopping ads. You can show ads for more than one of your products in one user query. So, your potential customers can see that you have a different product portfolio. You can also stand out from the competition.
Manage your campaign easily
Compared to other campaign types, shopping campaigns are quite easy to manage. All you have to do is set it up correctly and link your feed to your Ads account. After completing these processes and creating your campaigns, Google will match your products with search queries and show your ads.
So how should you install correctly? Let’s take a step-by-step look at how you can set up your Google Shopping campaign.
Setup Tutorial of Google Shopping Ads
Prepare the Product List
Shopping ads have a different setup and working mechanism compared to standard Google Search ads. The main difference is that in this type of ad, the product feed is targeted instead of keywords. A product feed is a file that uniquely identifies each of your products in your store. This file contains the name, description, referral link, stock status, etc. of your products. Google uses all this information to match your ads with users’ searches.
There are two different ways to create product feeds: dynamically and custom. The dynamic product feed is fed directly from the site content. In this way, you can transfer changes in price, stock status, etc. to your feed in real-time. A custom product feed is created by adding your product information to the CSV file. Since it cannot pull the site data dynamically, you have to make the edits manually in case of any changes. If you sell a lot of products, this will not be a practical choice for you.
You can use apps to create a dynamic product feed. In particular, there are different application alternatives for creating feeds in large e-commerce site infrastructures. You can easily create your dynamically updated feed by choosing the most suitable one among these applications.
Take your place at Merchant Center
-
- The First Step will be to open your Merchant Center account. If you still do not have a merchant Center account, you can start your setup here. Assuming you’ve created or already have your Merchant Center account, let’s move on to the next steps.
- Enter your business information. After completing your information such as business name, phone, and address, complete the verification with the SMS sent to your phone number.
- Let your online shoppers know how much tax they have to pay for your product. (necessary for US only). You must follow the sales tax regulations for the countries where you sell outside the US, you do not need to report them to Google.
You’ll need to verify and claim your e-commerce domain. There are 4 different options for website verification.
- HTML Tag
You can add an HTML code snippet(Meta tag) to the index page on your site. This code acts as an indicator for your website to be verified by Google. Do not remove the HTML tag to continue as a verified site.
- HTML File Upload
You can add new HTML files to the server of the site you want to verify. Do not remove these files to continue as a verified site.
- Google Tag Manager
If you’re an account-level administrator in Google Tag Manager, you can choose this verification method. The GTM container ID will be enough for the verification process.
- Google Analytics
If you’re an administrator in your Google Analytics account, you can choose this verification method. The Google Analytics tracking code will be enough for the verification process.
After submitting your URL for verification, you will receive a confirmation email from Google Search Console.
5) Then, add the delivery times and shipping costs of your products correctly into Merchant Center. Keep in mind that some of the things your potential customers pay attention to before clicking your ads are the shipping cost and delivery speed.
6) You are now ready to upload your product feed to your merchant account. You can add your feed by clicking on products and then on feeds from the left menu. After uploading your feed, you should wait for it to be processed. Then you can see the errors in your feed from the diagnostic section and make adjustments to your feed.
Some e-commerce platforms like Shopify can connect to Google Merchant Center via its API. Thanks to the API integration, the data is sent automatically, so you do not need to upload a feed.
2.3. Create your Google Shopping Campaigns
Your products have been approved and everything looks good in Merchant Center. So, welcome to the last step! You can now create your shopping ad campaigns by linking your Merchant Center account with your Google Ads account.
-
- Go to your Merchant account and click Settings > Linked Accounts.
- Select the Google Ads Client ID to request a link from your Google Ads account to the Google Ads account.
- Click ‘Connect’.
- Navigate to your Google Ads account and click Tools & Settings > Setup > Linked Accounts.
- Confirm the access request from Merchant Center.
If the account links are also okay, let’s create your campaigns.
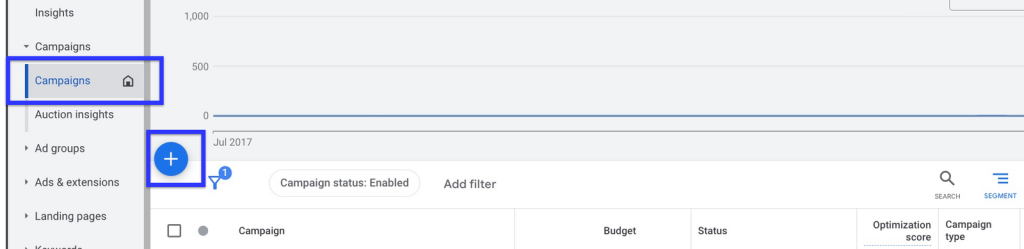
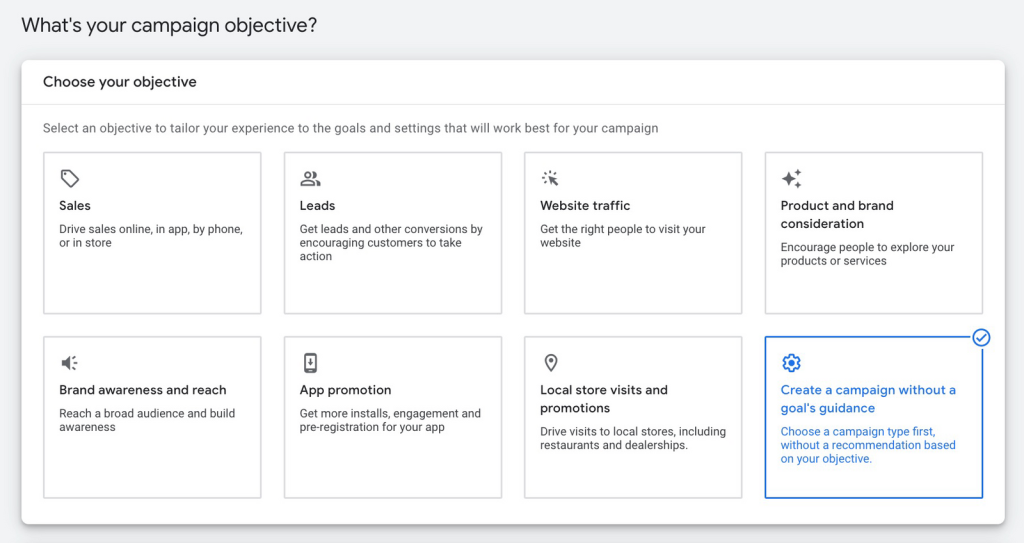
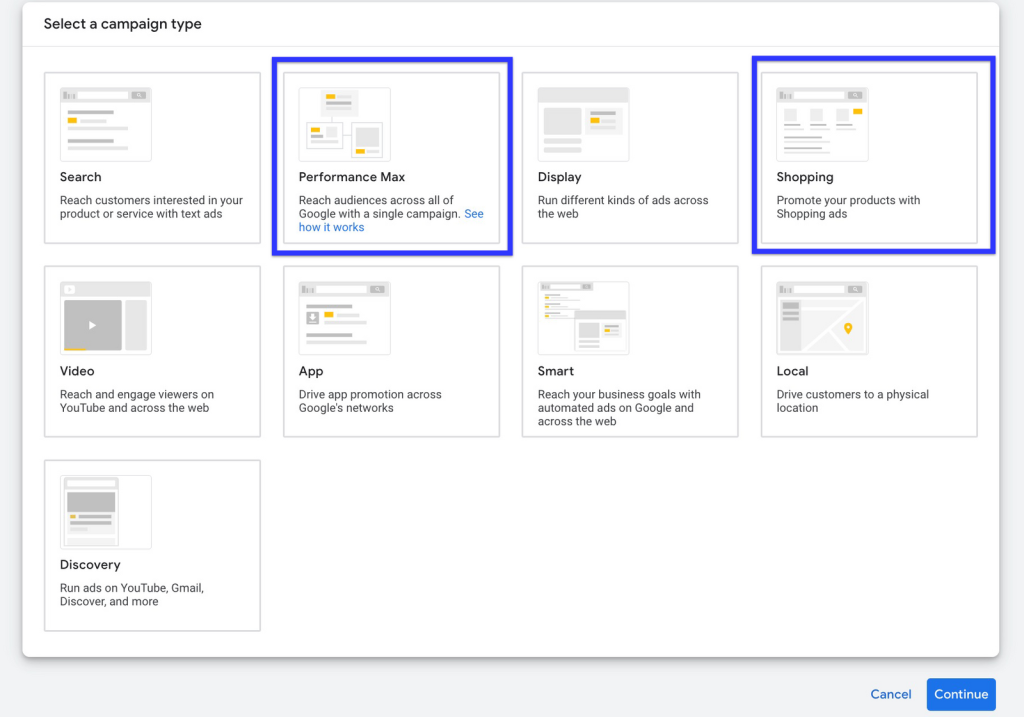
So which one should you choose? Let’s take a quick look at both types of campaigns before we decide.
Standard shopping campaigns are the type of ads that run on the Google Shopping tab. In order for users to see your ad, they need to search for the word that expresses your products on Google.
Actually, almost all of the topics we have mentioned so far are closely related to standard shopping ads. In addition to standard shopping ads, Google ads has a campaign type called Smart Shopping with automatic redirection. However, Google has decided to deprecate this campaign and introduced a brand new campaign type. Beginning in July of 2022, Google started to upgrade Smart Shopping campaigns to Maximum Performance campaigns.
Let’s get to know the Performance Max campaigns, which is the new Google ad type that we have heard for the first time or that you have come across recently.
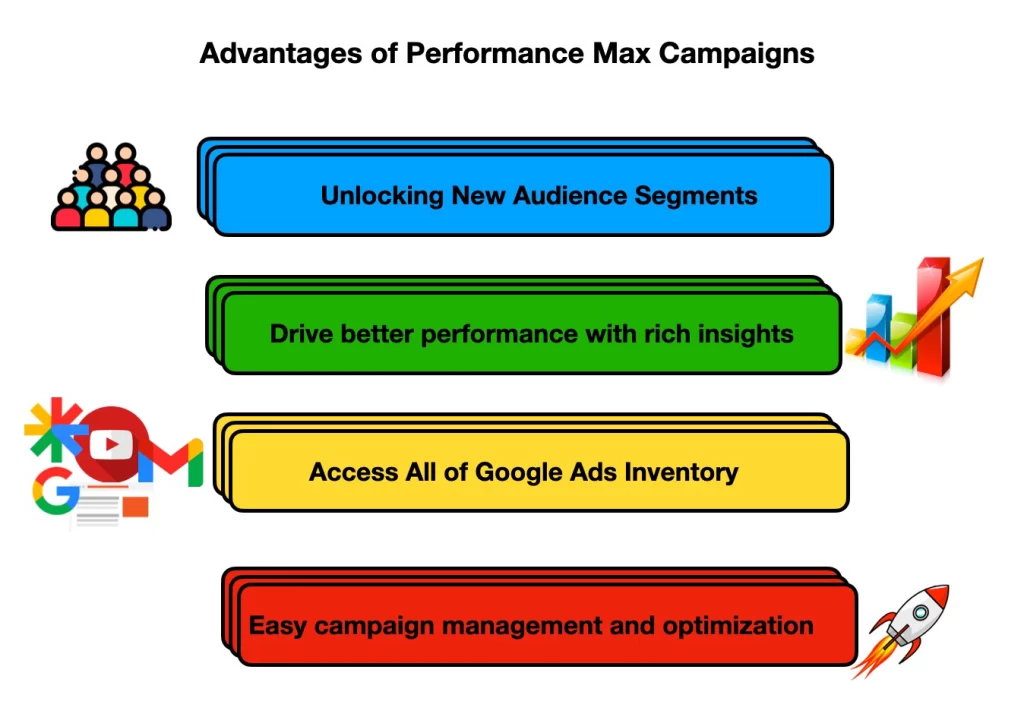
Performance max campaigns are one of Google’s new campaign types. With this campaign, you can reach your goals by accessing all Google Ads inventories (Shopping, Youtube, Search, Display) from a single campaign.
This campaign type is built on artificial intelligence and machine learning technologies and aims to reach potential customers with a high potential to convert. While enabling advertisers to reach their conversion goals, it is also fed by past conversions and audience signals. Thus, it aims to maximize the efficiency of advertising campaigns.
With the maximum performance campaign, you can show your shopping ads to audiences with high conversion potential. However, you need to add different asset groups as Performance max campaigns enable ad impressions across the entire Google Inventory.
Mandatories:
- Ad texts
- Images in different sizes
- Logo
- Video longer than 10 seconds
Optional:
- Audience signals
- Merchant Center account and product feed
- Google My Business account
Reminder: E-commerce websites must add their Merchant Center account and product feed.
You can select your advertising preferences (campaign name, offer strategy, daily budget, etc.) where you set the campaign type. Then you can start creating your ad groups.